ダウンロード
最新バージョン : 2.0.2-RELESE
| 2.0.2-RELESE | ダウンロードページ |
OpenRTM@Github
OpenRTM-aist GitHubサイト
ROS
Robot Operating System
Choreonoid
モーションエディタ/シミュレータ
DAQ-Middleware
ネットワーク分散環境でデータ収集用ソフトウェアを容易に構築するためのソフトウェア・フレームワーク
産総研が提供するRTC集
東京オープンソースロボティクス協会
| 2.0.2-RELESE | ダウンロードページ |
OpenRTM-aist GitHubサイト
Robot Operating System
モーションエディタ/シミュレータ
ネットワーク分散環境でデータ収集用ソフトウェアを容易に構築するためのソフトウェア・フレームワーク
産総研が提供するRTC集
東京オープンソースロボティクス協会
Launch Eclipse-All-In-One
Launch your "Ecilpse-All-In-One".
Select "RTC Builder" perspective by choosing "Window"-"Perspective"-"RTC Builder".
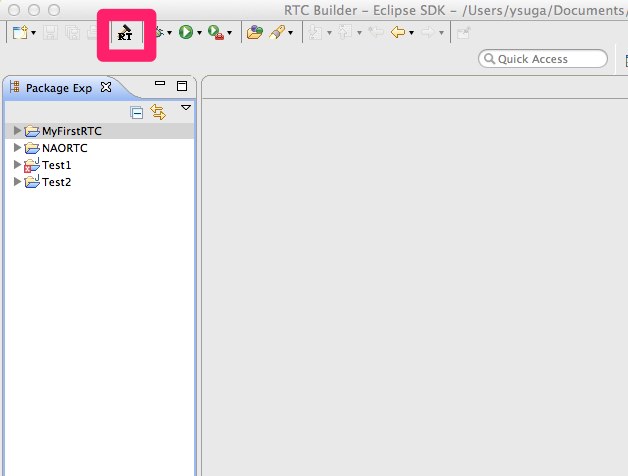
Open Your RTC Builder Editor
If you select RTC Builder perspective, you can find "Open Builder Editor" button shown in the figure below:
Then, you will find an input dialog like below:
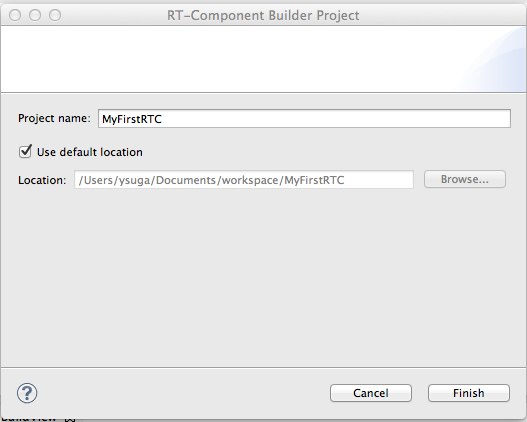
Please input your "Project Name". This will be used your project's folder name.
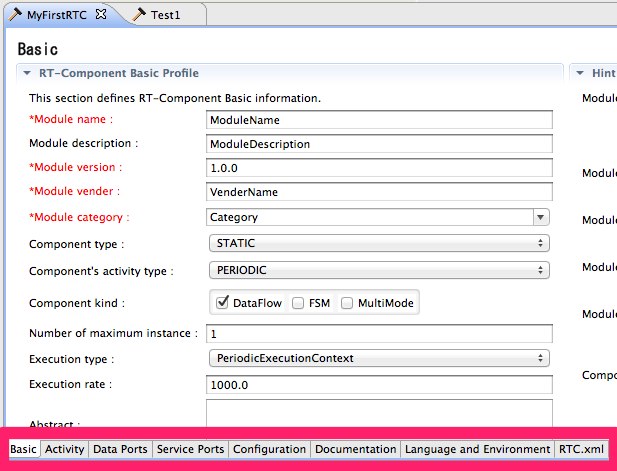
Now, you may find your Builder Editor in the center view of your eclipse.
In the Builder Editor, input items are categorized, and you must select "tabs" to complete your configuration.
Let's take a look in more detail ....
Basic Tab
In Basic Tab menu, you can input your basic information of your RT-components.
You can find some items are highlighted in red color, which means the items are need to be input.
In Basic Tab, "Module name", "version", "vendor name", and "category".
The category item is not used in this first step guide. But this item will influence the launching system named "Manager".
Activity Tab
Please select "Activity Tab" next.
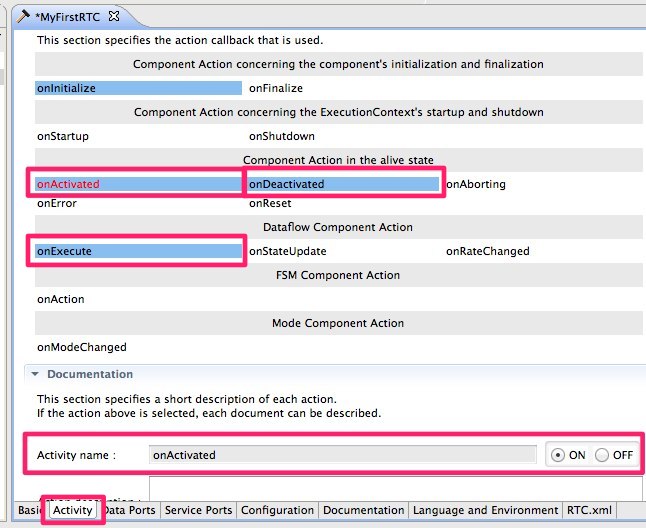
Here, you can select your RTC's activity.
As you might know, RTCs are "state machine", and the activities (call-backs) are called in the corresponding state transition.
Here, we will use three activities.
You may imagine that the "onActivated" would be appropriate for initialization method, and "onDeactivated" is "finalization".
That's true.
The RTC Builder will generate a skeleton code which implements these call-backs, and the only thing you must do is to modify the functions.
Language and Environment
Then, select "Language and Environment" tab.
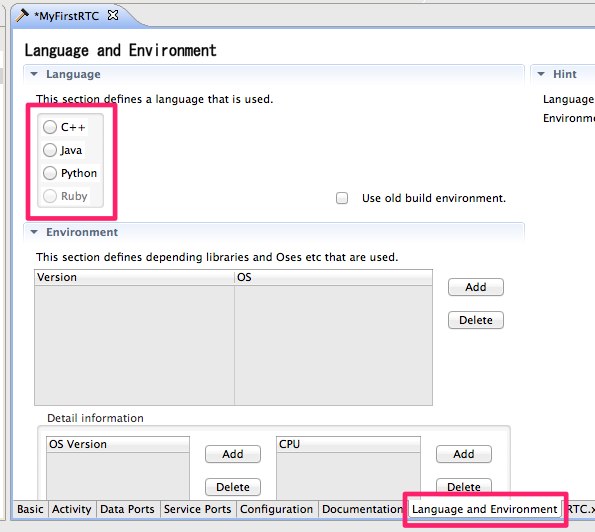
Here, you can select your programming language.
This tutorial will show you how to implement the basic APIs in "C++", "Java", and "Python" languages.
You can select your favorite language here.
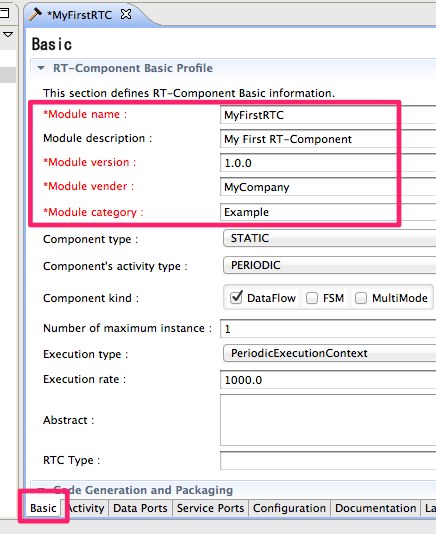
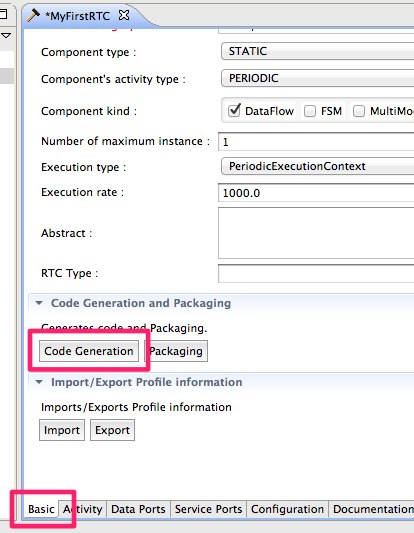
Basic Tab
Now you must return to the "basic tab", and let's generate your first RTC's skeleton-codes.
Press "generate" button.
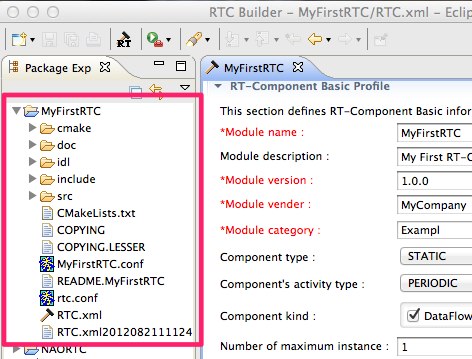
The following image represents an example of output files in C++ environment setting.
Documentation: