Old docuement
NXTRTC
This sample is included with the Python edition of OpenRTM-aist. It is not included in the C++ or Java editions.
Introduction
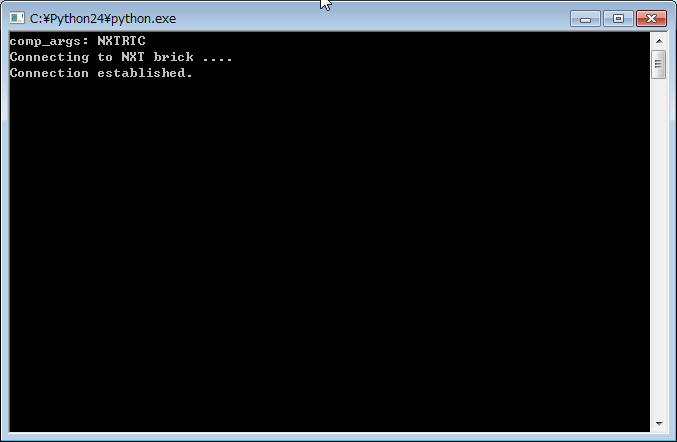
NXTRTC.py is a component that controls the motors and outputs the sensor data for LEGO Mindstorm NXT. See Development of RT-Components (for LEGO Mindstorms) for details.
Screenshots
Running the samples
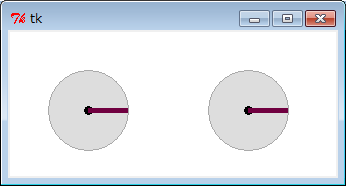
Connect to TkJoystickComp (input device) with GUI and TkMotorComp (output device), check motor control and values of LEGO.
For details, please refer to RT Component Creation (edited by LEGO Mindstorm) manual.
Use the following procedure to start the sample:- Start RTSystemEditor and prepare SystemEditor. → For details on how to use RTSystemEditor, see RTSystemEditor
- here please refer to the PC and LEGO Mindstorm with Bluetooth, or USB.
- Start NXTRTC.py, input device TkJoyStickComp.py, TkMotorComp, each component.
- Since components are displayed in NameServiceView of RTSystemEditor, drag them onto SystemEditor.
- Connect the corresponding ports of both components. (See SystemEditor execution example above)
- Right-click on either component and select "All Activate".
Installation on KuroBoxHG
Installation on KuroBoxHG
Installation on KuroBox/HG
Following Installation of OpenRTM(on PPC) by Yamashita-san at Maekawa MFG, we tried to install OpenRTM-aist-0.4.0 with our KuroBox.
Our procedures are almost same as those of Yamashita-san, but the package install included in OpenRTM-aist-0.4.0 makes it easier to install omniORB, ACE, and so on. Moreover it was need to modify configure.ac in the past, but we corrected its defect based on Yamashita-san's advices, so the modification of the configuration is not needed now. At the result, we don't have to install autotools neither.
KuroBox/HG Specification
| CPU | PowerPC 266MHz |
| RAM | 128MB |
| Flash ROM | 4MB |
| LAN | 1000BASE-T/100BASE-TX/10BASE-T x 1 port |
| External IO | USB2.0 x 2ports |
| HDD | one 3.5 inch UltraATA is prepared separately. |
| OS | Default is Montavista Linux (Kernel2.4.17) |
Procedures of Installation
Debian, Vine, GentooLinux seem to work, among them, Debian seems to be best for its rechiness of packages and easiness for upgrade. General procedure is as follows:
- Download Debian image from kuro-box wow wow!
- Extract the image to KuroBox using KuroBoxSetup.exe included in KuroBox CD
- Since Debian3.0(Woody) is installed in this stage, upgrade to Debian3.1(Sarge)
- Install packages with pkg_install_debianSarge.sh
- Build and install OpenRTM-aist-0.4.0
Thus, once you install Debian, you can continue to install the same way as Debian on i386.
Switching of OS
Get the kernel image
The page Debian in KurobakoHG hack is easy to understand about how to switch OS. But the link to Debian image offerd by kuro-box wow wow! is for older version, so please download the image from the following page.
We offer Debian image file for your download. We have downloaded this file, renamed its name in accordance with the later procedures, and zipped.
- image.zip
- Replace this with the image.zip included in KuroBox CD-ROM.
- Original distribution files at kuro-box wow wow!
- Note: we mirror the files because kuro-box wow wow! recommends to redistribute.
- debian_2006_06_10_dist.tar.gz
- install_debian.txt
- install_debian_standalone.txt
Preparion of Installer
Copy contents in KuroBox CD-ROM under an appropriate directory. Rename image.zip in the directory which KuroBoxSetup.exe exists in(CD-ROM root) to another name such as image.zip.org and put image.zip which you downloaded at the previous step there instead.
Switching to EM Mode
Switch the mode of KuroBox to EM mode. See
EM mode is a mode which the installer can recognize, you need set up this mode for KuroBoxSetup.exe to transfer an image. Right after you purchase and connect HDD, KuroBox is in this mode.
If you have already installed Linux included in KuroBox, you can make it enter EM Mode as follows:
 Switch to EM mode.
 # echo -n 'NGNG' > /dev/fl3
   Or
 # /usr/bin/write_ng
 # reboot
 Shut down power, and turn on power again.
 Switch back from EM mode.
 # echo -n 'OKOK' > /dev/fl3
   Or
 # /usr/bin/write_ok
 # reboot
You can also make it EM mode forcibly by destruction of the file system on HDD.
 # rm -rf /
   Or
 # dd if=/dev/zero of=/dev/hda bs=1024 count=1024
Transfer of Image
Once KuroBox is in EM mode, launch KuroBoxSetup.exe of KuroBox installer which you replace to Debian image previously, and set up the new image. If an error message like KuroBox cannot be found, is shown, the mode may not be EM mode. If there is no problem, the install will finish successfully, and after KuroBox restarts, it will be available.
Configuration
Default configuration of KuroBox which is replaced to Debian image as above, is set up as follows:
| Default User | |
| User name | tmp-kun |
| Password | tmp-kun |
| root | |
| User name | root |
| Password | root |
| Network Configuration | |
| IP address | 192.168.0.100 |
| Gateway address | 192.168.0.1 |
| DNS address | 192.168.0.1 |
IP address is fixed. Install a terminal software to PC which you use for this configuration, set up IP address of this PC to the address which can connect to the KuroBox(such as 192.168.0.1 mask 255.255.255.0), and connect the PC via LAN.
 telnet 192.168.0.100
 Debian GNU/Linux 3.0 KURO-BOX
 KURO-BOX login: tmp-kun
 Password: tmp-kun
 (snip)
 Debian GNU/Linux comes with ABSOLUTELY NO WARRANTY, to the extent
 permitted by applicable law.
 KURO-BOX:~> su
 #
Log in as the account tmp-kun, and switch to root to set up.
For example, set up its IP address as follows:
 # vi /etc/network/interfaces
 Edit its IP address
 # vi /etc/hosts.allow
 Edit hosts.allow
When you change its IP assress, you must change its hosts.allow, too. If you change it to a different network address and forget to change its hosts.allow, you can never log in to the box again.
Upgrading to Sarge
In this stage, Debian3.0(Woody) is installed. Upgrade to the current version, Debian3.1(Sarge).
Edit of sources.list
Rename the default sources.list to another name such as sources.list.org, and append the next two lines to sources.list.
 deb http://cdn.debian.or.jp/debian/ sarge main contrib non-free
 deb-src http://cdn.debian.or.jp/debian/ sarge main contrib non-free
Once you edit, run the next commands:
 apt-get update
 apt-get dist-upgrade
During this upgrade, you can answer default to serveral questions you will be asked. However /etc/init.d/halt is overrided and it disables the shutdown operation by its power buttion, so add the next two lines after the line of PATH:
 PATH=/sbin:/bin:/usr/sbin:/usr/bin
 echo -n "EEEE" > /dev/ttyS1
 sleep 3
TIPS
xterm and kterm are useful when you accss from a remote machine. But even if you install them on the default environment, they cannot start because of an error which relates pty. You need to modify /etc/fstab as follows:
 /etc/fstab
 none   /dev/pts     devpts  gid=5,mode=20           0 0
 modify like this
 none   /dev/pts     devpts  gid=5,mode=620          0 0
Install xterm and kterm. Relavant files of XLib are also installed, so you have to make sure there is enough free space.
 # apt-get install xterm
 # apt-get install kterm
Build of OpenRTM-aist
Installation of the package
To install the package, you can use the package installer for Debian(pkg_install_debianSarge.sh) without modification, which is included in OpenRTM-aist-0.4.0. Once you extracted the source of OpenRTM-aist-0.4.0, switch to root and just run pkg_install_debianSarge.sh under the build directory.
 > tar xvzf OpeNRTM-aist-0.4.0.tar.gz
 > cd OpenRTM-aist-0.4.0
 > cd build
 > ls
 (snip)
 README.Debian  makewrapper.py             pkg_install_vl32.sh
 autogen        pkg_install_debianSarge.sh  pkg_install_vl4.sh
 (snip)
 > su
 # ./pkg_install_debianSarge.sh
That's all for installation of the package.
Build of OpenRTM-aist
The following procedure is as same as for a normal PC.
 > cd OpenRTM-aist-0.4.0
 > ./configure
 > make
 > su
 # make install
However, it takes quite a long time(about 1 hour and 45 minutes) to build.
 > time make
 6048.130u 156.950s 1:43:36.53 99.8%     0+0k 0+0io 762267pf+0w
Acknowledment
When we wrote this OpenRTM-aist installation guide on KuroBox, OpenRTM-aist-0.2.0 install report by Mr. Tomoki Yamashita (Maekawa MFG, Co.Ltd) was very informative. We also referred the following web pages. We would like to thank those authors.Installation on KuroBoxPro
Installation on KuroBox/PRO
KuroBox/PRO Specification
| CPU | Marvell88F5182 (ARM9Core/400MHz) |
| RAM | 128MB(DDR2) |
| Flash ROM | 256MB(NAND)/Linux2.6.12.6 |
| LAN | 1000BASE-T/100BASE-TX/10BASE-T x 1 port |
| External IO | USB2.0 x 2 ports, S-ATA x 2, PCIex1 x 1, UART x 1, GPIO x 2, I2C x 1, JTAG(ARM20pin) |
| HDD | 3.5 inch S-ATA is prepared separately. |
Procedures of Installation
There are some examples of how to replace with Debian, you seem to be able to replace with Debian the easiest according to the procedure of sushi-k-nisshi2-san.- Replace with Debian according to the procedure in sushi-k-nisshi2-san site.
- Install the required package with apt-get.(or the installation script is used)
- Build of OpenRTM-aist
- Installation
Switch of OS
Please follow the procedure in sushi-k-san. A hard disk that you use should be unformatted.
Switch of tar
You switch tar because it seems not to be able to use "tar" of BusyBox.
 # wget http://w3.quake3.jp/sushi-k/pool/kuropro/debian/gnutar_kuropro.gz
 You can transfer this from Windows to a Kurobox via samba.
 # gzip -dc gnutar_kuropro.gz >/bin/tar
 # chmod a+x /bin/tar [Enter]
Installing Debian kit
You download the Debian kit and extract it in the root.
 # wget http://w3.quake3.jp/sushi-k/pool/kuropro/debian/debian_kit.tar.gz [Enter]
 # tar xvzpf debian_kit.tar.gz -C / [Enter]
Transfer of Debian image
In KuroBox PRO, you put the following file in the shared directory "mtd device(/mnt/mtd)".- uImage.buffalo
- hddrootfs.tar.gz
- ChangeMeDevHDD
- ChangeMyUbootEnv
Hold down the reset switch in the back, then system construction for HDD boot starts automatically. (this is written in Manual).
Download the disc image of Debian from here, and put these file on mtd device. You can do this from Windows via samba or get it with wget.
HDD boot Environment Construction
Hold down the reset switch for 5 seconds in the back. Orange info lamp blinks in front, and partitioning of HDD, extracting the format and the image etc are done. You don't have to dare to log out because you can see an inside condition while you log in. When the info lamp turns off, the proceeding is sure to have finished. KuroBox that is replaced with Debian is sure to start.
Configuration
This system is the following settings immediately after restart.
| IP address | 192.168.1.81 |
| root password | kuroadmin |
You can login only by ssh, so you login from an appropriate ssh client to set it.
Build of OpenRTM-aist
Installation of package
To install the package, you can use the package installer for Debian(pkg_install_debianSarge.sh) without modification, which is included in OpenRTM-aist-0.4.0. Once you extracted the source of OpenRTM-aist-0.4.0, switch to root and just run pkg_install_debianSarge.sh under the build directory.
 > tar xvzf OpenRTM-aist-0.4.0.tar.gz
 > cd OpenRTM-aist-0.4.0
 > cd build
 > ls
 (snip)
 README.Debian  makewrapper.py             pkg_install_vl32.sh
 autogen        pkg_install_debianSarge.sh  pkg_install_vl4.sh
 (snip)
 > su
 # ./pkg_install_debianSarge.sh
That's all for installation of the package.
Build of OpenRTM-aist
The following procedure is as same as for a normal PC.
 > cd OpenRTM-aist-0.4.0
 > ./configure
 > make
 > su
 # make install
However, it takes quite a long time(about 1 hour and 45 minutes) to build.
 > time make
 5898.850u 251.470s 1:43:47.10 98.7%     0+0k 0+0io 278pf+0w
It is not so different from KuroBox HG.
Link
Install rtshell
(G)Introduction
This document explains how to install rtshell on Windows.
(G)What is rtshell
rtshell is a tool that can manage the RT component registered on the name server from the shell (command prompt). You can activate/deactivate/reset the component and connect the port. It is also possible to manage the entire RT system.
(G)Installation flow
- Installing OpenRTM-aist Python version and PyYAML
- Install rtctree (support library)
- Install rtsprofile (support library)
- Install rtshell
- Execution confirmation
(G)Installing OpenRTM-aist Python version and PyYAML
OpenRTM-aist-Python is required for some functions (system management) of rtshell. Install Python 2.6 or 2.7 and OpenRTM-aist-Python according to the installation document of OpenRTM-aist-Python. Documentation. PyYAML will be downloaded and installed from PyYAML website. The version is okay even if it is the latest.
(G)Installation of rtctree
From openrtm.org download site Download rtctree-3.1 package (rtctree-3.1.0.win32.exe).
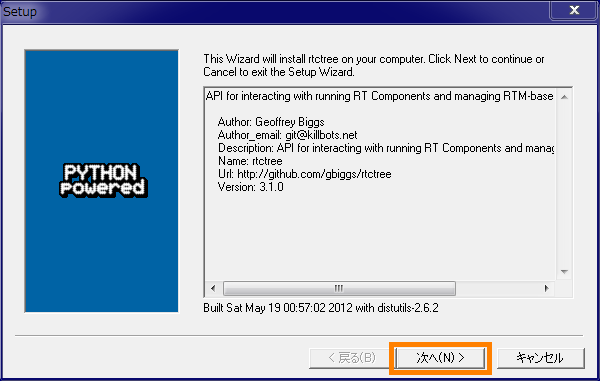
When you run the package, the following dialog will be displayed, and click [Next].
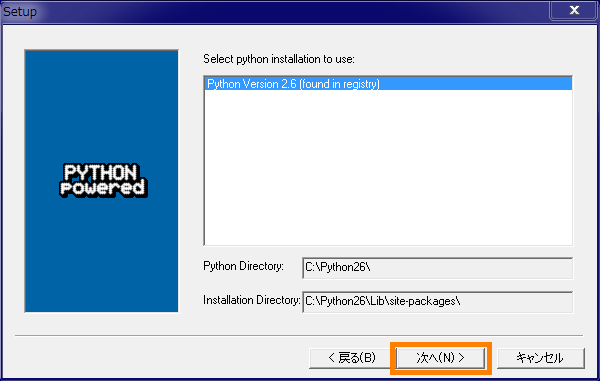
A dialog to select the version of Python is displayed. Confirm that the correct version of Python is selected, and click [Next]. In the example below Python 2.6 is selected.
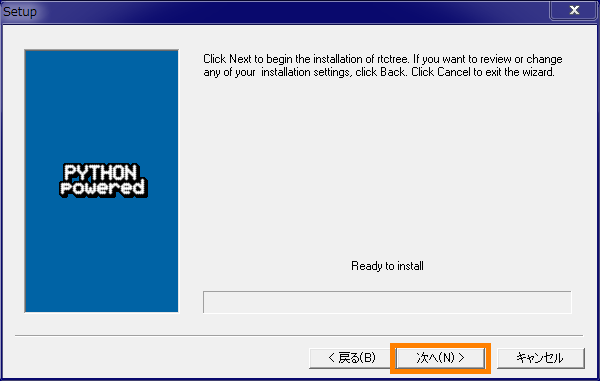
The "Ready to Install" dialog is displayed. Then click [Next].
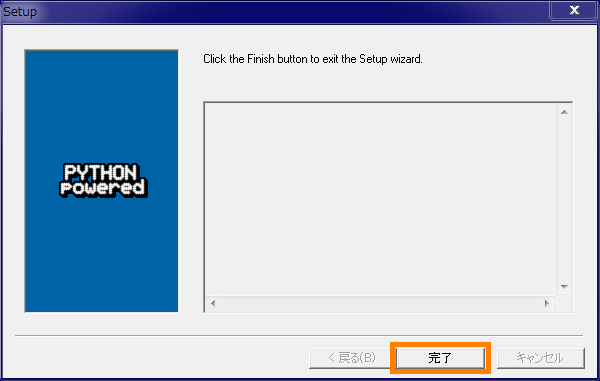
Installation will be done. When you are finished, click [Finish] to complete the installation.
(G)Installation of rtsprofile
From openrtm.org download site Download rtsprofile-3.1 package (rtsprofile-3.1.0.win32.exe).
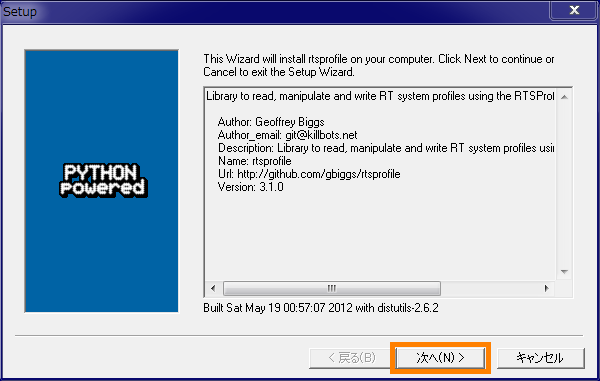
When you run the package, the following dialog will be displayed, and click [Next].
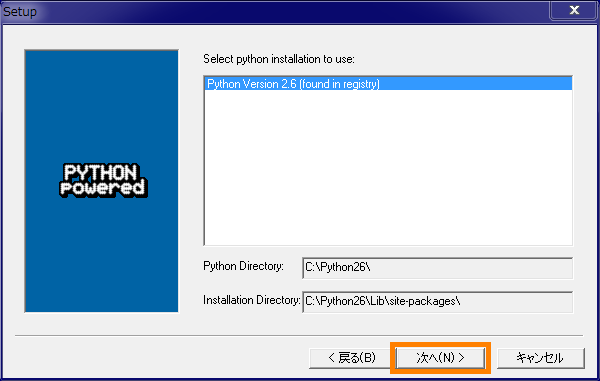
A dialog to select the version of Python is displayed. Confirm that the correct version of Python is selected, and click [Next]. In the example below Python 2.6 is selected.
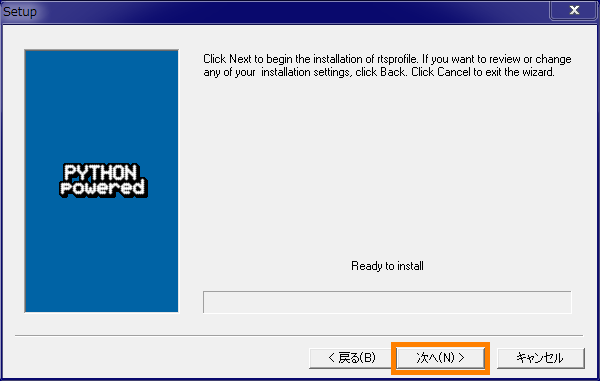
The "Ready to Install" dialog is displayed. Then click [Next].
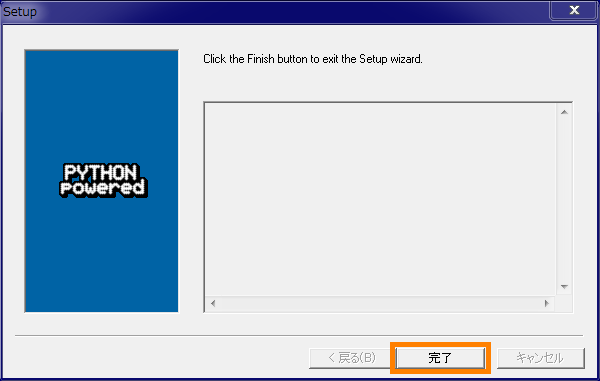
Installation will be done. When you are finished, click [Finish] to finish the installation.
(G)Installation of rtshell
From openrtm.org download site Download rtshel- 3.0.0 package (rtshell-3.1.0.win32.exe).
When you run the package, the following dialog will be displayed, and click [Next].
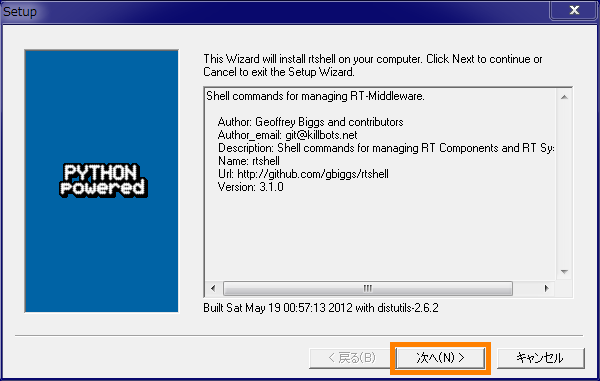
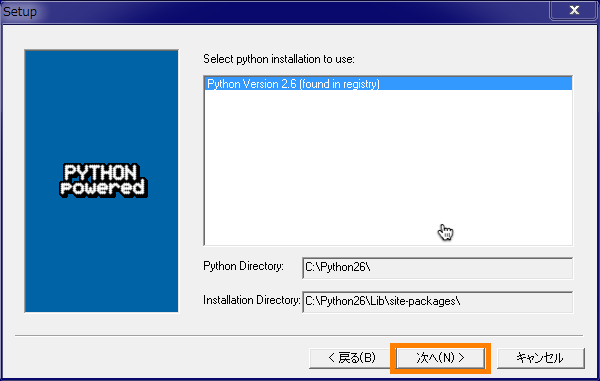
A dialog to select the version of Python is displayed. Confirm that the correct version of Python is selected, and click [Next]. In the example below Python 2.6 is selected.
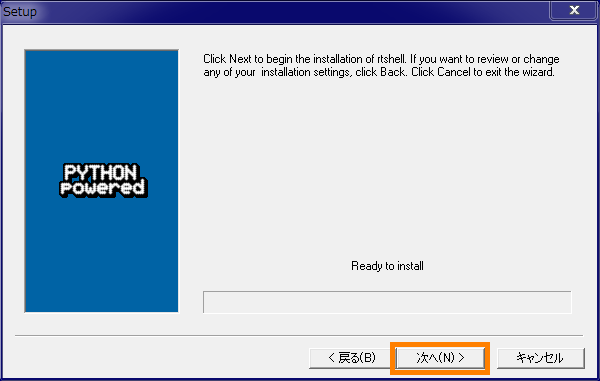
The "Ready to Install" dialog is displayed. Then click [Next].
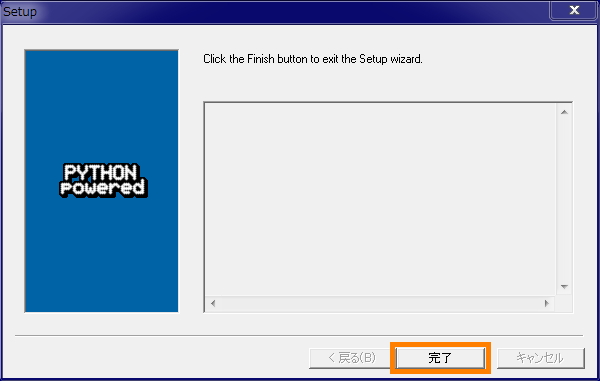
Installation will be done. When you are finished, click [Finish] to complete the installation.
(G)Confirmation of execution
For execution confirmation, execute rtls command of rtshell command group and test whether rtshell is correctly installed. First, start the OpenRTM-aist name service and start ConsoleIn. After starting the component, start the Windows command prompt.
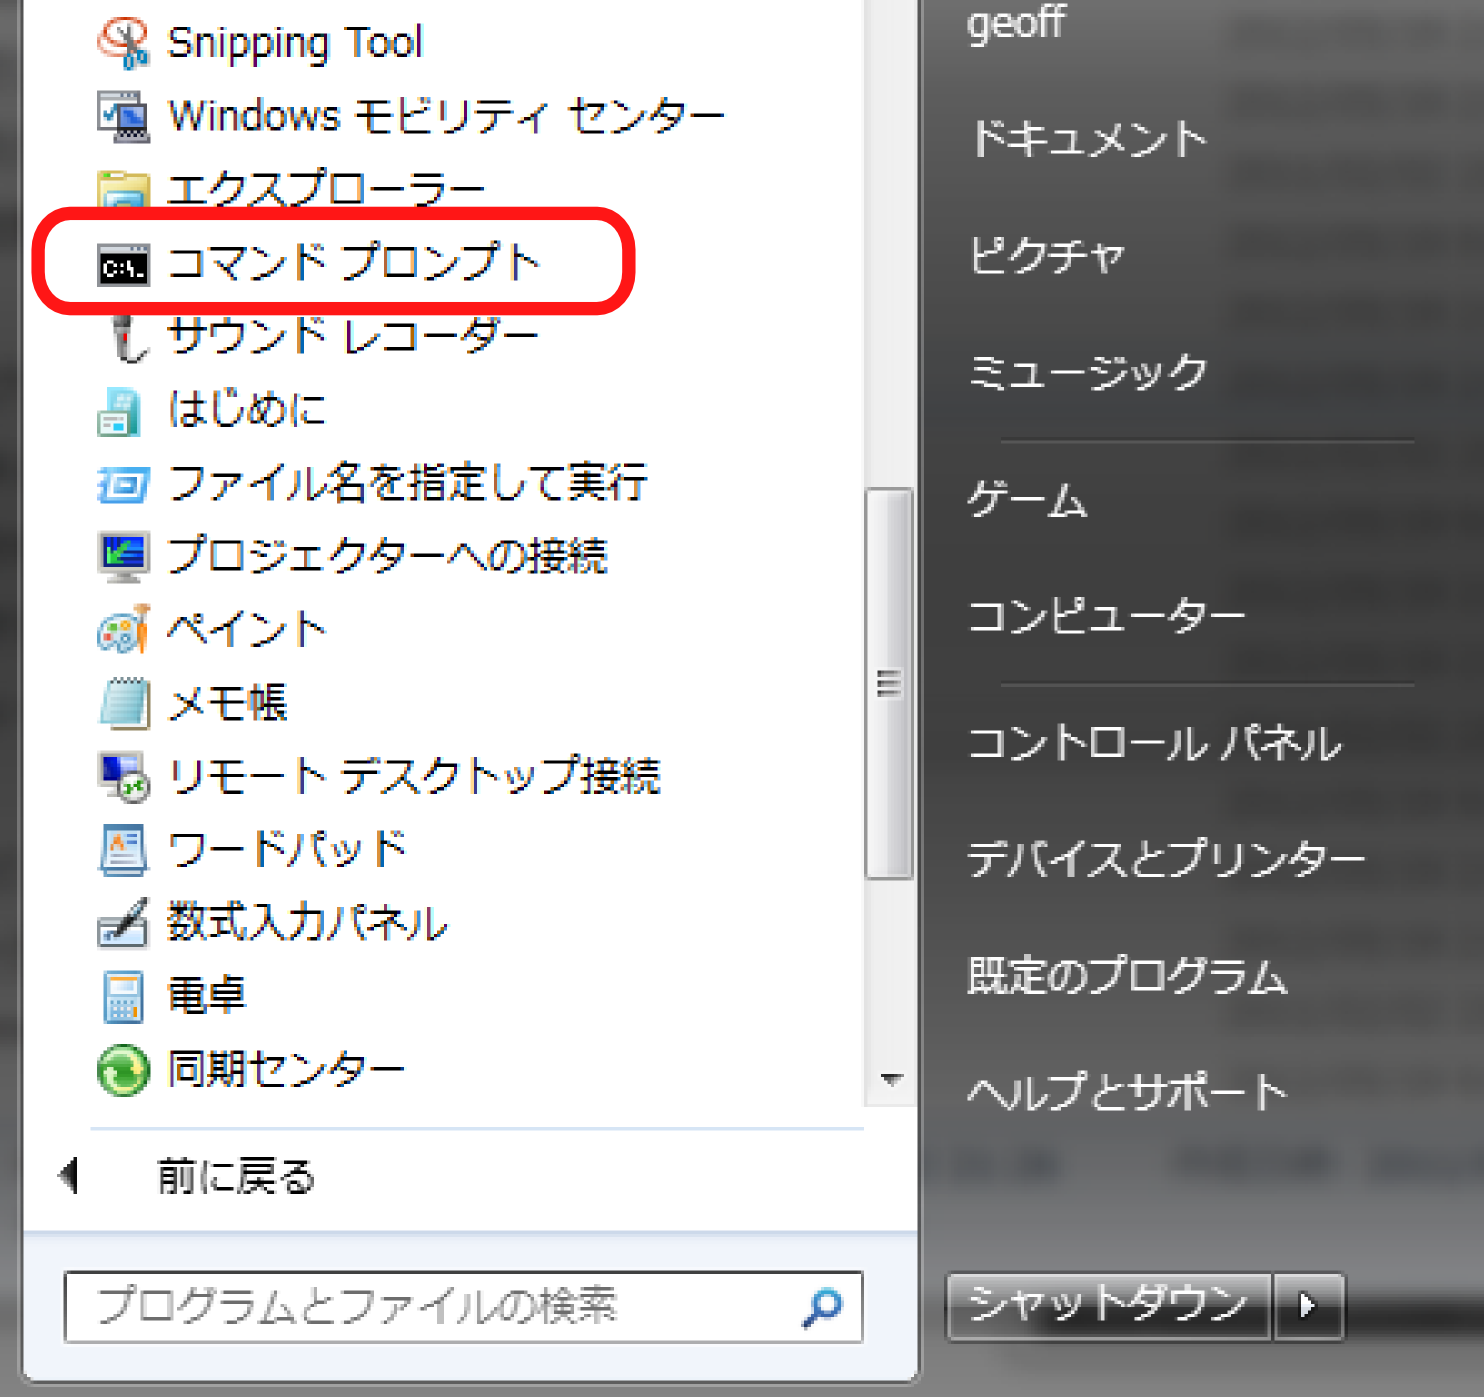
Execute the following command at the command prompt.
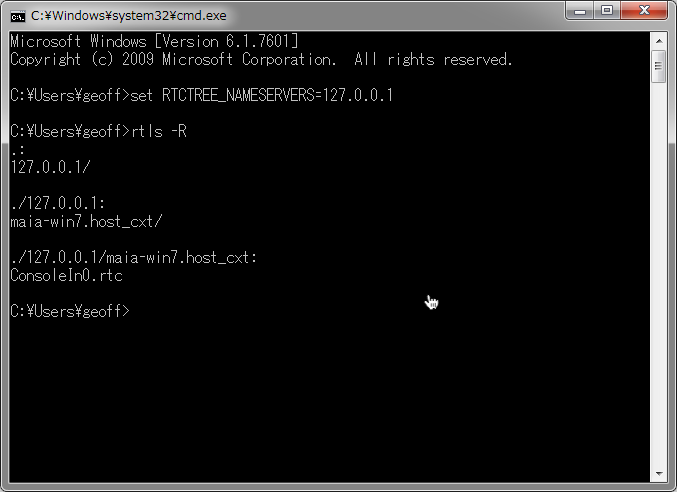
  set RTCTREE_NAMESERVERS=127.0.0.1
  rtls -R
The first line sets environment variables. "RTCTREE_NAMESERVERS" is a variable used by rtshell's support library rtctree, and specifies the name server seen by rtshell. The second line shows the components registered in all name servers. In the case of success, it is displayed as follows.
(G)In case it does not move
If the command can not be found, there is a possibility that PATH is not set. Adding two paths like the following to the PATH environment variable will work. (An example is when Python 2.6 is installed.)
  C:\Python26
  C:\Python26\Scripts
Installation on Armadillo240
Armadillo240 is a compact CPU board that can be mounted on Linux with ARM, which is sold from At Mark Techno. Three development tools from Atmark Techno, Inc., ATDE2 (Atmark Techno Development Environment), GNU cross development tool, AtmarkDist are provided, which makes cross development easy.
In this example, we will cross-develop the executable file of the RT component that can be executed by Armadillo. After that, after starting Armadillo, create an image file (romfs: root file system) that the RT component automatically starts up.
(G)Workflow
- Development of cross development environment
- Maintenance of ATDE2 (installation of necessary packages)
- Cross compiling and installing of OpenRTM-aist
- Cross compiling of RT components
- Start executable file on Armadillo240
- Create image file of Armadillo240
- Operation confirmation on RtcLink
(G)Building cross development environment
Create an executable file of RT component that can be executed by Armadillo by cross-compiling. The development environment of Armadillo series is distributed from Atmark Techno, Inc. as a VM image, and necessary tools for cross development environment are pre-installed.
(G)Downloading ATDE2 and VMware
- ATDE2
- ATDE2(Atmark Techno Development Environment) is a virtual PC image for VMware for Admadillo cross development environment distributed from AtmarkTechno. The entity is Debian GNU Linux, and the tool chain necessary for cross development is installed in advance.
- here page for free.
- VMware Player
- Virtual PC software freely distributed from VMware Inc. can execute VMware's virtual PC image. It is necessary to start ATDE2. Although there are Windows version and Linux version, we will proceed as below using VMware Player for Windows version.
- here page for free.
(G)Activating ATDE2 and VMware
- Start ATDE2 with VMware.
Unzip ATDE2-20071018.zip, double click on ATDE2.vmx in the folder you unzipped, or select ATDE2.vmx from ATDE2-20071018 in the folder extracted from file > Open of VMware.
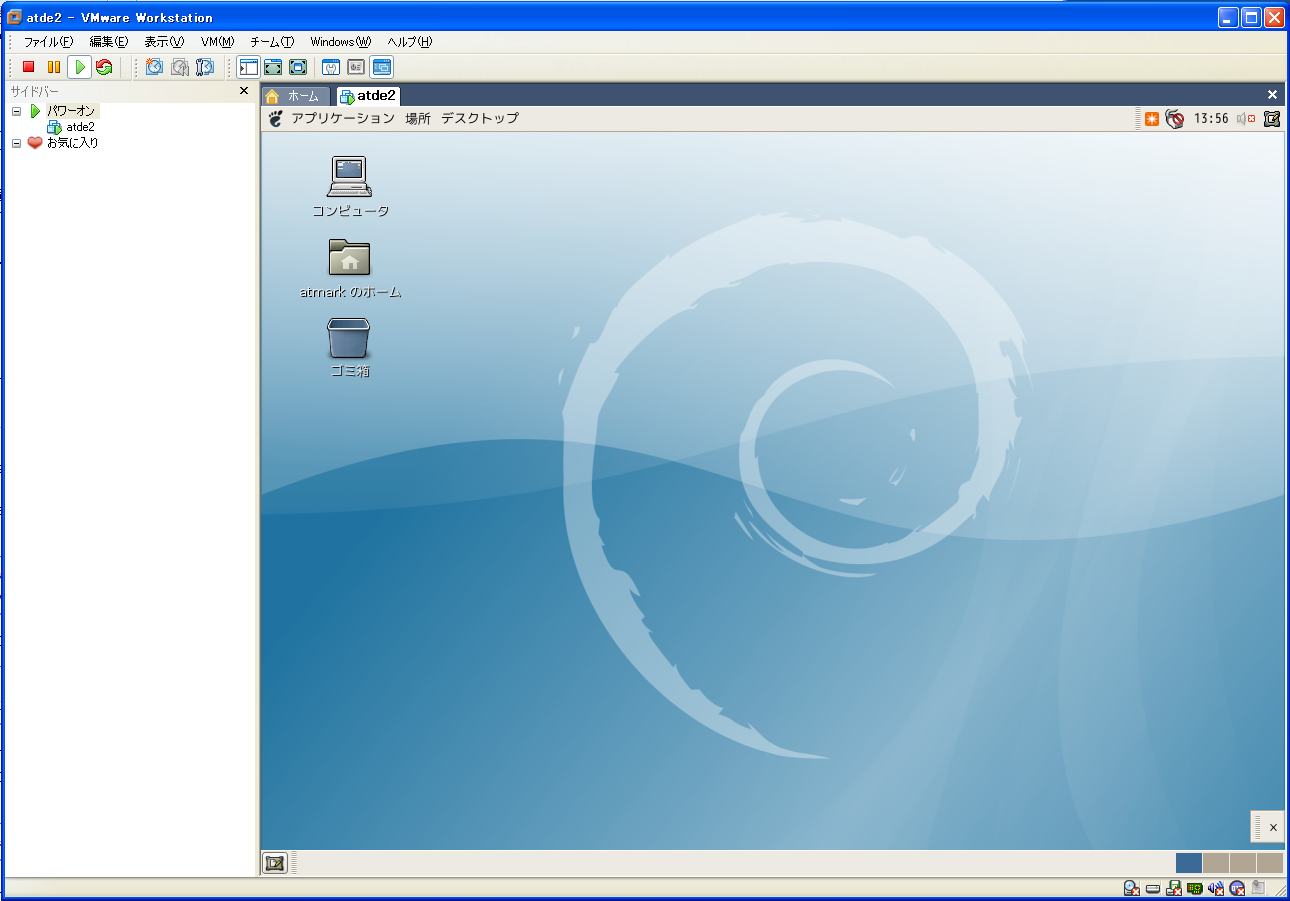
- Start up with "Start this virtual machine".
- There is no login work and the Desktop of ATDE2 is displayed.
(G)Development of ATDE2 development environment
ATDE2 already has a cross-compiling environment, but it is necessary to prepare an environment that allows cross-development of RT component of OpenRTM. On the started ATDE2 download the following source and shell script and place it in the appropriate working directory under the home directory.
- download
- OpenRTM source code
- config100.sh / config 042.sh
- You can run it in the expanded OpenRTM-0.4.2.tar.gz, or OpenRTM-1.0.0.tar.gz, and specify configure options necessary for cross compiling.
- It is divided into correspondence with OpenRTM-0.4.2 and OpenRTM-1.0.0 correspondence. 2010/01/21
- arm-cross-install.sh
- OpenRTM-1.0.0 is now supported. 2009/12/28
- Build OpenRTM's ARM cross-compilation environment on Debian host.
- arm-cross-install.sh downloads the deb package with the apt-get command. Add the URL containing the deb package to sources.list. Become root (password: root) with the su command and add the URL below to /etc/apt/sources.list.
 deb http://downloads.pylone.jp/cross-toolchain/deb ./
 deb http://www.openrtm.org/pub/Linux/debian/ etch main
- Leave root, install the package with the apt-get command. The python-yaml package is required for rtc-template after installing OpenRTM.
 # apt-get update
 # apt-get install python-yaml (Please enter yes or Y to complete the installation.)
- Construct the OpenRTM-aist arm-cross-compilation environment with arm-cross-install.sh. Since a lot of data is downloaded, create an appropriate working directory and execute arm-cross-install.sh in it.
# sh arm-cross-install.sh (Please enter yes or Y to complete the installation.)
- By running arm-cross-install.sh, packages necessary for cross-compiling OpenRTM-aist are downloaded and installed, but as a side effect, some packages such as gdm are deleted I will. When gdm is deleted, the graphical desktop screen will not be displayed. If you want to return it, reinstall gdm as follows.
 # apt-get install gdm (Please enter yes or Y to complete the installation.)
 # /etc/init.d/gdm start
- By running arm-cross-install.sh, packages necessary for cross-compiling OpenRTM-aist are downloaded and installed, but as a side effect, some packages such as gdm are deleted I will. When gdm is deleted, the graphical desktop screen will not be displayed. If you want to return it, reinstall gdm as follows.
- The maintenance of the ATDE2 environment is completed with the above.
(G)Cross compilation of OpenRTM-aist
(G)Build OpenRTM-aist
Deploy the OpenRTM-aist-0.4.2 source code to a suitable directory such as home directory. After deployment, go to the created directory.
 # tar zxvf OpenRTM-aist-0.4.2.tar.gz
 # cd OpenRTM-aist-0.4.2
 # cp ../config.sh ./
 # sh config.sh/usr/arm-linux-gnu
# make
 OpenRTM-aist-0.4.2/rtm
 OpenRTM-aist-0.4.2/rtm/idl
 OpenRTM-aist-0.4.2/utils/rtm-config
 OpenRTM-aist-0.4.2/utils/rtm-naming
 OpenRTM-aist-0.4.2/utils/rtc-template
(G)Installing OpenRTM-aist
It is installed in /usr/arm-linux-gnu/specified in config.sh.# make install
(G)Cross-development of RT components
With this, the environment for cross development of the RT component is in place. Here, as an example, try cross-compiling using the source of SeqOutComp included in the sample.
(G)RT component cross development
- To cross-develop an RT component, you need to use the command for cross development, so pass it through the (/usr/arm-linux-gnu/bin) path as follows. Be careful that /usr/arm-linux-gnu/bin is at the beginning of PATH when passing through the path.
> export PATH=/usr/arm-linux-gnu/bin:$PATH
(G)Generate the RT component of SimpleIO with rtc-template.
Create a suitable directory to create the sample and copy the following files contained in the OpenRTM sample SeqOut source into it.
SeqOutComp.cpp SeqOut.h SeqOut.cpp Makefile.SeqOut
 > mkdir test
 > cp (installation directory)/OpenRTM-aist-0.4.2/examples/SeqIO/SeqOutComp.cpp ./test/
We create a component called SeqOutComp with eight OutPorts.
(G)Build RT component
Please check the contents of the generated Makefile.SeqOut. If there is no line beginning with CXX =, you need to specify the cross compiler for the compiler as follows.
Set environment variable and make make
> CXX=arm-linux-gnu-g++ make -f Makefile.SeqOut
 > export CXX=arm-linux-gnu-g++
 > make -f Makefile.SeqOut
When make completes normally, SeqOutComp executable file is generated.
(G)Running the RT component
Copy cross-developed executable files, libraries, etc. to USB memory and start up on Armadillo240.
(G)Preparing the USB memory
Copy and generate the files necessary for executing the RT component on the Armadillo240 to the USB memory.
- Executable file
- Executable file of the RT component you want to run on Armadillo240.
In this example, we use SeqOutComp that we cross-compiled earlier. Copy SeqOutComp to the appropriate location (such as the root directory) of the USB memory.
- Library
- Library of ARM is stored under /usr/arm-linux-gnu/lib of ATDE2.
Of the libraries in this directory, copy the following to the USB memory. Create a directory lib to place the library in the USB memory.
 >mkdir lib
 or
 For the GUI, right click to create a folder
When copying the library of /usr/arm-linux-gnu/lib, change the name as follows.
- OpenRTM-aist-0.4.2 case
- Change library name When copying, please change the name as follows.
| Library name | After changing library name |
| libomniDynamic4.so.0.6 | libomniDynamic4.so.0 |
| libomniORB4.so.0.6 | libomniORB4.so.0 |
| libomnithread.so.3.1 | libomnithread.so.3 |
| libRTC - 0.4.2 .so.0.0.4 | libRTC - 0.4.2.so.0 |
| librt.so.1 | librt.so.1 (no change) |
| libACE.so.5.4.7 | libACE.so.5.4.7 (no change) |
- For OpenRTM - aist - 1.0.0
- Change library name
| Library name | After changing library name |
| libm -2.3.6.so | libm.so.6 |
| libomiDynamic4.so.0.6 | libomniDynamic4.so.0 |
| libomnithread.so.3.1 | libomnithread.so.3 |
| librt.so.1 | librt.so.1 (no change) |
| libRTC - 1.0.0 .so.0.0.4 | libRTC - 1.0.0.so.0 |
| libstdc ++. so.6.0.8 | libstdc ++. so.6 |
| libuuid.so.1.2 | libuuid.so.1 |
- rtc.conf
- Please create rtc.conf like below using a text editor.
Since Armadillo does not start the name server, please start the name server on another PC. For the option of corba.nameservers in rtc.conf, specify the address of the PC that started the name server.
 corba.nameservers: 192.168.100.1 (Enter the IP address of your name server)
 naming.formats:% n.rtc
- * Mounting of USB memory with ATDE2
- When inserting the USB flash memory into the PC while VMware (ATDE2) is running, it can be mounted automatically and checked on Desktop.
If it is not mounted automatically, use the su command on VMware (ATDE2) terminal to become root and mount again.
- USB memory mounted
 > su
 # mkdir /mnt/(suitable directory)
 # mount - t vfat/dev/sdb1/mnt/(directory created above)
- Unmount USB memory
 If the USB memory icon is displayed on the Desktop, right click> unmount it. &br;
 Or you can unmount it with the command from the console. &br;
 # umount /mnt/(the directory created above)
(G)Directory structure of USB memory
After preparing the USB memory, the USB memory has the directory structure as shown below.
- OpenRTM-aist-0.4.2
     USB memory  -+- lib --+- libomniDynamic4.so.0
                |     +- libomniORB4.so.0
                |     +- libomnithread.so.3
                |     +- libRTC-0.4.2.so.0
                |     +- librt.so.1
                |     +- libACE.so.5.4.7
              |
              +- SeqOutComp
              |
+- rtc.conf- OpenRTM-aist-1.0.0
  USB memory   -+- lib --+- libm.so.6
                |     +- libomniDynamic4.so.0
                |     +- ibomnithread.so.3
                |     +- librt.so.1
                |     +- libRTC-1.0.0.so.0
                |     +- libstdc++.so.6
                |     +- libuuid.so.1
                |
              +- SeqOutComp
              |
              +- rtc.conf
(G)Start executable file with Armadillo240&aname (start240);
Change the USB memory mount setting and library PATH setting, and move the executable file. You can operate Linux on Armadillo by connecting the PC and Armadillo with a serial cable and logging in from Linux serial console on Armadillo. Please proceed with the following easy method.
(G)Operate with minicom from ATDE2
From ATDE2, operate with terminal emulator program minicom. Connect the serial port of the PC and the serial port of Armadillo with a serial cable. For a PC without a serial port, you need to use a USB-serial conversion cable or the like. Refer to the Armadillo manual for how to connect the Armadillo serial cable.
Configure the VMware virtual machine's device as follows.
Menu bar > VM > Settings > Hardware tag
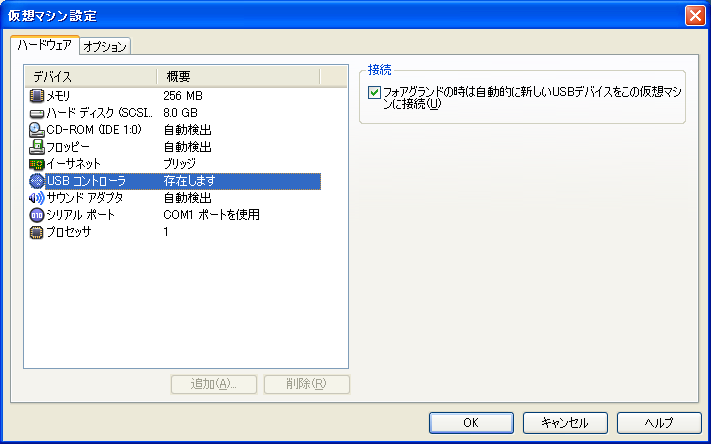
Please check the connection check.
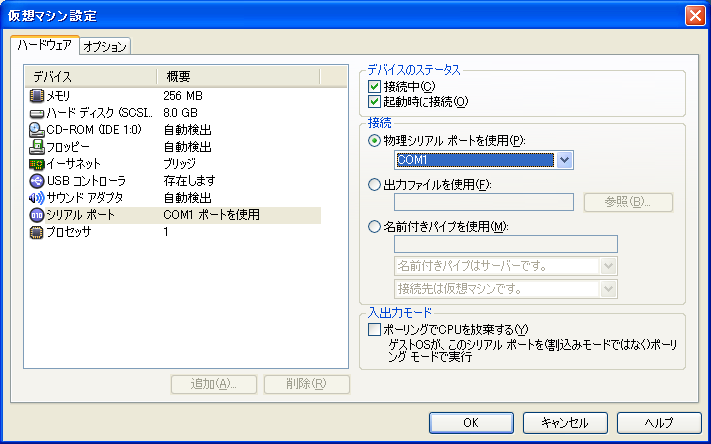
Check the device status and check the port using Connection> Physical Serial Port. Start the terminal emulator minicom from the terminal of ATDE2.
> minicom
(G)Operate with Windows terminal emulator (teraterm)
You can also connect to Armadillo's serial console from Windows using a terminal emulator such as TeraTerm. TeraTerm can be downloaded for free from here. Please start with the following setting.
- Menu bar> Settings> Serial port setting>
- Port/optional
- Baud rate/115200
- Data/8bit
- Parity/none
- Stop/1bit
- Flow control/none
When starting with the above setting, the login screen of Armadillo240 will be displayed. If it is not displayed, press Enter. Please proceed to the common operation after that.
(G)Common operation
Please plug the USB memory into Armadillo. Please log in as root (password: root) on Armadillo login screen. The default mount is an option (umous=111), which permission setting any user can not execute.
Once unmounted, it will be remounted with the -o rw option that can be written and executed.
 # umount/dev/sda1
 # mount - t vfat - o rw /dev/sda1/home/www-data/storage/
 # su guest
 > cd /home/www-data/storage
 > export LD_LIBRARY_PATH = $ {LD_LIBRARY_PATH}:/home/www-data/storage/
> ./SeqOutComp (executable file was executed)You can also check from RtcLink.
In this method, you have to modify the setting every time you start Armadillo. In the next chapter, after Armadillo starts, it creates an image file that the RT component automatically starts and downloads it to Armadillo.
(G)Create an image file of Armadillo240
With the previous method, it is necessary to change the setting with the terminal emulator every time Armadillo starts up. In this case, use atmark-dist provided by AtmarkTechno, Inc, create an image file that RT component automatically starts after Armadillo240 start up, and download it to Armadillo.
(G)Development environment development
Use the environment of ATDE2 cross-compiled RT component as it is. Please download the following items on ATDE2.
- Atmark-dist
- Create an Armadillo userland image file.
- here for free.
- Linux kernel
- Required when creating image files with Atmark-dist.
- here for free. (In the case of Armadillo240)
- openrtm_new.patch, Atmark-dist (2009/03/18) with the verification of patch Fixed the file. (2010/02/12)
(G)Build and configure atmark-dist
Here, we will create an image file of userland of Armadillo. By using the image file created here, you can start RT Component that was previously installed in USB memory automatically.
(G)How RT Component starts
Mount the USB memory to /home/openrtm/, and start Armadillo /home/openrtm/boot.sh. boot.sh starts the executable file through the library path in the USB memory.- OS setting
- Write USB memory, executable and mount on /home/openrtm/.
- When USB memory is mounted, start boot.sh directly under the USB memory.
- Contents of USB memory
Please prepare the following files in the USB memory.
- boot.sh
- Shell script to launch after Armadillo240 starts. Please prepare the following boot.sh directly under the USB memory. Run the executable file through library PATH.
- This is the setting when rtc.conf is placed under the USB memory and the library is placed in the lib directory. Correct according to the directory structure of the USB memory.
 #!bin/sh
 . /etc/default/openrtm.conf
 export LD_LIBRARY_PATH=$LIBPATH:/home/openrtm/lib/
 /home/openrtm/SeqOutComp(Execution file name)  -f  /home/openrtm/rtc.conf
(G)atmark-dist Build
Please download atmark-dist and linux kernel, openrtm.patch on ATDE2 and expand it.
 > tar zxvf atmark-dist - 20090318.tar.gz
 > tar zxvf linux - 2.6.12.3 - a9 - 15. tar.gz
> ln -s ../linux-2.6.12.3-a9-15 ./linux-2.6.x
 > make config
 Select the Vendor you wish to target:     Atmarktechno (input)
 Select the product you wish to target:    Armadillo-240.Recover (input)
 Kernel is linux - 2.6.x:                             default (even with enter)
 defined CONFIG_DEFAULTS_CROSSDEV_DEFAULT:      none (also OK)
 Default all settings:                                y (input)
 Customize Kernel Settings:                    n (even enter)
 Customize Vendor / User Settings:        n (even enter)
 Update Default Vendor Settings:            n (also OK, end)
Copy openrtm.patch and apply the patch as follows.
 > cp openrtm.patch /atmark-dist-YYYYMMDD/vendor/AtmarkTechno/Armadillo-240.Recover/openrtm.patch
 > cd /atmark-dist-YYYYMMDD/vendor/AtmarkTechno/Armadillo-240.Recover/
 > patch -p1 <openrtm_new.patch
 (Patch finished)
 > cd ../../../
 > make dep all
 /bin/sh: extensions/.dccp-test: No permission
 /bin/sh: extensions/.layer 7-test: No permission
 /bin/sh: extensions/.statistic-test: No permission
 make[2]: Enter directory `/home/atmark/Desktop/foratde/forkernel/atmark-dist-200807 17/user/iptables'
 romfs-inst.sh /bin/iptables
 romfs-inst.sh -l /bin/iptables/bin/iptables-save
 Accessing ln: `/bin/iptables': No such file or directory
 romfs-inst.sh -l /bin/iptables/bin/iptables-restore
 Accessing ln: `/bin/iptables': No such file or directory
 > ls images
 linux.bin    linux.bin.gz    romfs.img    romfs.img.gz
(G)Download image file to Armadillo240
Download the generated userland image file romfs.img.gz to Armadillo240. Armadillo short the jumper pin (2), please turn on the power (Armadillo Hardware Manual please refer to p.16)
You can download from either VMware (ATDE2) or Windows.
(G)Download from ATDE2
Here to configure the device of VMware virtual machine before proceeding.
- Connect the Armadillo-240 and the PC with a USB serial cable (or serial cable).
- Download images/romfs.img.gz with hermit from the terminal console of ATDE2. Download takes about 8 minutes.
> hermit download - i images/romfs.img.gz - r userland - port/dev/ttyUSB 0 (or /dev/ttyS0)
- It is completed when completed is displayed.
serial: completed 0x004455fd (4478461) bytes. (Completed)
(G)Download from Windows
Please put downloader > win32 > Hermit.zip of CD-ROM bundled with Armadillo240 on Widows.
- Extract Hermit.zip on Windows and double-click Hermit.exe to start it.
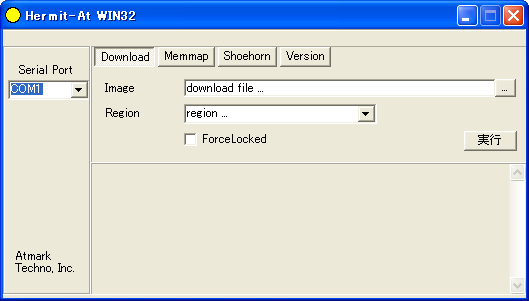 Windows上のHermit
- Connect the Armadillo240 to the PC via the serial port.
- Move romfs.img.gz generated on ATDE2 on Windows.
- Configure the serial port in the displayed dialog and press Download. Set romfs.img.gz created with images to userland in Region and click the download button to download. (It will take about 8 minutes.)
- When downloading is completed, it will be displayed in Hermit.
(G)Execution/confirmation of RT component
Start RTCLink and confirm start of RT component.
- After the image file download is completed, remove short circuit of Armadillo's jumper pin (2), plug the power supply and restart it.
- When you run the RT component, start the name server specified in rtc.conf.
- For Windows
- Execute "OpenRTM-aist" > "example" > "NameService.bat" from the program menu.
- Alternatively, double click on rtm - naming.bat in OpenRTM-aist\bin and start it.
- For Linux
- Become root with the su command and start the name server.
 > su
 # /etc/init.d/omniorb4-nameserver start
- Become root with the su command and start the name server.
- For Windows
- Start up RTCLink and check that the component is created on the name server.
- If the name server is not displayed, please push the Connect Name Server button and add a name server.
(G)Application example
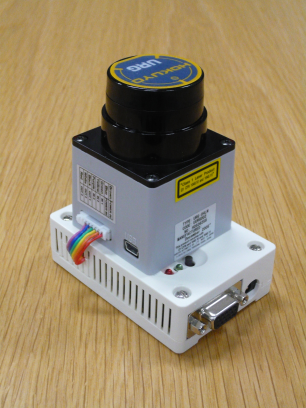
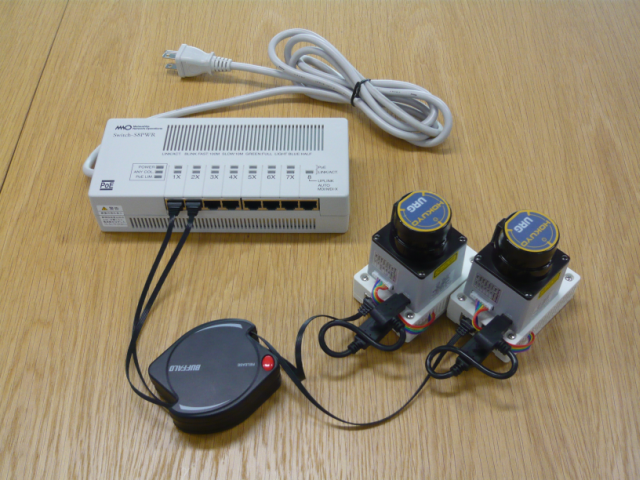
(G)Armadillo + URG sensor
Combined with Armadillo and Hokuyo Electric URG sensor, it is a unit to easily construct a distributed sensor system. The URG sensor RT component works on Armadillo. (RTC starts automatically at the same time as Armadillo power is turned on.) By using Armadillo compatible with PoE (Power over Ether), communication and power supply are possible only with the LAN cable. The URG sensor also operates with power supply from PoE. Sensor arrangement is possible with only one cable, so you can easily construct a distributed sensor system.
