サンプルコンポーネントの実行
OpenRTM-aistのインストール
上述のリンクから ev3dev のイメージで EV3 を起動した場合、すでに OpenRTM-aist (C++、Python版) がインストールされています。 その場合は、以下の OpenRTM-aist のインストールはスキップして、サンプルコンポーネントの実行から進めてください。
自分で ev3dev.org からイメージをダウンロードした場合は、OpenRTM-aist のパッケージを apt-get 等でインストールします。
sources.list の編集
openrtm.org をパッケージリポジトリとして追加するために、/etc/sources.list を編集します。
# vi /etc/apt/sources.list
のように、vi で /etc/apt/sources.list を開き、
 deb http://ftp.debian.org/debian jessie main contrib non-free
 deb http://ev3dev.org/debian jessie main
 deb http://openrtm.org/pub/Linux/debian jessie main ← この行を追加
この例のように、最下行に openrtm.org のリポジトリを追加します。
その後、
# apt-get update
OpenRTM-aist パッケージのインストール
以上で、openrtm.org のパッケージリポジトリにアクセスできるようになりましたので、以下のようにしてパッケージをインストールします。
 # apt-get install libomniorb4-dev omniidl
 # apt-get install openrtm-aist openrtm-aist-dev openrtm-aist-example python-yaml
 # apt-get install gcc g++ make uuid-dev
 # apt-get install python-omniorb
 # apt-get install openrtm-aist-python openrtm-aist-python-example
パッケージのインストールにもかなりの時間がかかりますので気長に待ちます。途中でバッテリーが切れないように、アダプタに接続したまま作業することをお勧めします。
OpenRTM-aistのサンプルの実行
ConsoleIn-ConsoleOut (C++)
C++のサンプルコンポーネントを動作させて、OpenRTM-aistが正しくインストールできているかどうかを確認します。
EV3上で ConsoleIn を実行したうえで、PC上で ConsoleOut を実行して相互に接続し、PCから入力した数字が EV3上で表示できるかどうかを確認してみます。
ConsoleIn の起動
まず、EV3上で、ネームサービスと ConsoleIn を起動します。 omniorb-nameserver というパッケージがインストールされているはずですので、すでにシステムのサービスとして起動していますが、ネットワークがらみのトラブルを避けるためにも、rtm-naming というコマンドで起動させた方が良いでしょう。
Windows などでは TeraTerm などのターミナルソフトウェア、Linux ではコンソールから EV3 に ssh でログインします。
ログインしたら、まず rtm-naming を起動します。途中で既存のネームサーバを落とすかどうか聞いてきますので y と答えて進みます。
              _____     _
    _____   _|___ /  __| | _____   __
   / _ \ \ / / |_ \ / _` |/ _ \ \ / /
  |  __/\ V / ___) | (_| |  __/\ V /
   \___| \_/ |____/ \__,_|\___| \_/

 Debian jessie on LEGO MINDSTORMS EV3!
 :中略
 # rtm-naming
 Starting omniORB omniNames: ev3dev:2809
 omniORB: Failed to bind to address 0.0.0.0 port 2809. Address in use?
 omniORB: Error: Unable to create an endpoint of this description: giop:tcp::2809
 :中略
 and start omniNames by rtm-naming? (y/N)y ← yを入力
 Stopping omniNames by /etc/init.d/omniorb4-nameserver.
 [ ok ] Stopping omniorb4-nameserver (via systemctl): omniorb4-nameserver.servic.
 Starting omniORB omniNames: ev3dev:2809

 Wed Aug  5 11:04:01 2015:

 Starting omniNames for the first time.
 Wrote initial log file.
 Read log file successfully.
 Root context is IOR:010000002b00000049444c3a6f6d672e6f72672f436f734e616d696e672f4e616d696e67436f6e746578744578743a312e30000001000000000000007400000001010200100000003139322e3136382e3132382e31303400f90a00000b0000004e616d6553657276696365000300000000000000080000000100000000545441010000001c000000010000000100010001000000010001050901010001000000090101000354544108000000a1edc1550100028f
 Checkpointing Phase 1: Prepare.
 Checkpointing Phase 2: Commit.
 Checkpointing completed.
 omniNames properly started
 root@ev3dev:~#
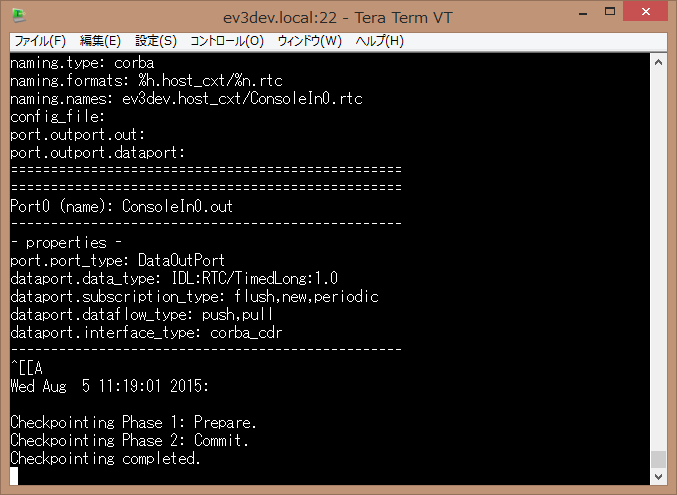
次に、ConsoleInComp を起動します。
 root@ev3dev:~# /usr/share/openrtm-1.1/example/ConsoleInComp
 Creating a component: "ConsoleIn"....succeed.
 =================================================
  Component Profile
 -------------------------------------------------
 InstanceID:     ConsoleIn0
 :中略
 port.outport.dataport:
 =================================================
 =================================================
 Port0 (name): ConsoleIn0.out
 -------------------------------------------------
 - properties -
 port.port_type: DataOutPort
 dataport.data_type: IDL:RTC/TimedLong:1.0
 dataport.subscription_type: flush,new,periodic
 dataport.dataflow_type: push,pull
 dataport.interface_type: corba_cdr
 -------------------------------------------------
ConsoleOut の起動
PC上で ConsoleOut を起動します。Windowsであれば、ネームサーバ、RTSystemEditor、ConsoleIn をそれぞれ以下のように起動します。
- ネームサーバの起動
- 「スタート」>「OpenRTM-aist x.y」>「Tools」>「Start C++ Naming Service」
- RTSystemEditorの起動
- 「スタート」>「OpenRTM-aist x.y」>「Tools」>「RTSystemEditor」
- ConsoleInの起動
- 「スタート」>「OpenRTM-aist x.y」>「C++」>「Components」>「Examples」>「ConsoleOutComp.exe」
Linux であれば、ネームサービス、eclipse、ConsoleInComp を以下のように起動します。
 $ rtm-naming
 $ <eclipseの起動> &
 $ /usr/share/openrtm-1.1/example/ConsoleOutComp
 :中略
 naming.names: ubuntu1404.host_cxt/ConsoleOut0.rtc
 config_file:
 port.inport.dataport:
 port.inport.in:
 =================================================
 =================================================
 Port0 (name): ConsoleOut0.in
 -------------------------------------------------
 - properties -
 port.port_type: DataInPort
 dataport.data_type: IDL:RTC/TimedLong:1.0
 dataport.subscription_type: Any
 dataport.dataflow_type: push,pull
 dataport.interface_type: corba_cdr
 -------------------------------------------------
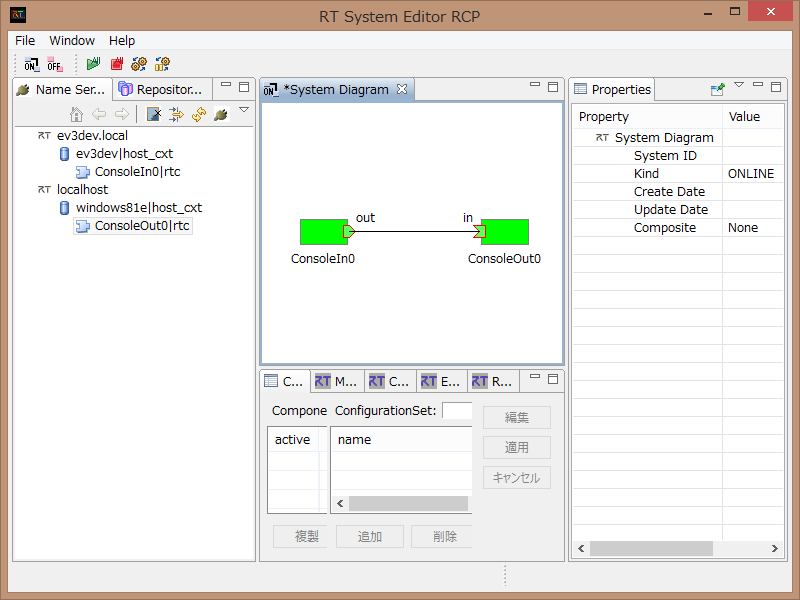
OpenRTP (eclipse) または、RTSystemEditotr (RPC版) から、EV3 で起動したネームサーバと PC で起動したネームサーバーにそれぞれ接続します。
それぞれのネームサーバに ConsoleIn (EV3のネームサーバー) と ConsoleOut (PC側のネームサーバー) が現れるはずので、それぞれエディタにドラッグアンドドロップして、InPort と OutPort を接続、Activate します。
ConsoleIn の方から数値を入力し、ConsoleOut の方で表示されれば、テストは成功です。
ConsoleIn-ConsoleOut (Python)
今度は、上記とは逆に、ConsoleIn を PC で、ConsoleOut を EV3 上で実行し接続してみます。
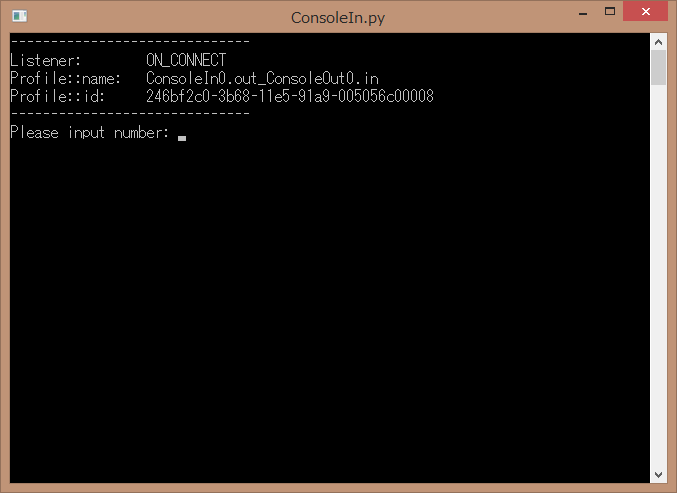
PC上では、以下のように ConsoleOut を起動します。。
- ConsoleOutの起動
- 「スタート」>「OpenRTM-aist x.y」>「Python」>「Components」>「Examples」>「ConsoleOutComp.exe」 PC上で実行した ConsoleIn (Python版)
- 「スタート」>「OpenRTM-aist x.y」>「Python」>「Components」>「Examples」>「ConsoleOutComp.exe」
次に、EV3上で、以下のように ConsoleOut.py を起動します。
 # python /usr/share/openrtm-1.1/example/python/SimpleIO/ConsoleOut.py
 ------------------------------
 Listener:        ON_CONNECT
 Profile::name:   ConsoleIn0.out_ConsoleOut0.in
 Profile::id:     246bf2c0-3b68-11e5-91a9-005056c00008
 ------------------------------
RTSystemEditor上で、ConsoleIn と ConsoleOut を接続し、Activate します。 ConsoleIn側で数値を入力し、ConsoleOut側で表示されれば、テストは成功です。
その他の組み合わせとして、C++ と Python のコンポーネントを起動して接続してみる、他のサンプルコンポーネントを起動して通信させてみるなど試してみてください。


