
using xbee modules with pirt-unit
✏️ Edit this page on GitHub#contents
Using XBee Modules with PiRT-Unit
PiRT-Unit has a connector for connecting the ZigBee module XBee. It can be used from RaspberryPi via a serial device for communication with other ZigBee modules, and can also be used to make the serial console wireless. In Raspbian Wheesy, it is configured as the serial console by default. This guide explains how to make the serial console wireless using XBee.
Connecting XBee and a PC
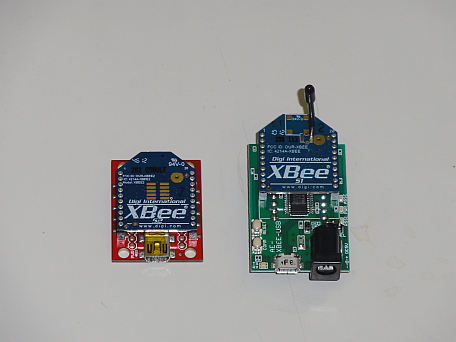
To connect an XBee module to a PC, you need to use an XBee-USB Explorer. It has an XBee module connector and a USB connector, and by connecting it to a PC, you can configure various XBee settings from the PC and use XBee as a serial port.
XBee-USB Explorers are sold by various manufacturers.
| Product name | Manufacturer | Price | URL |
|---|---|---|---|
| AE-XBEE-USB | Akizuki Denshi Tsusho | 1,280 yen | http://akizukidenshi.com/catalog/g/gK-06188/ |
| SFE-WRL-08687 | Sparkfun Switch Science |
2,619 yen | http://www.switch-science.com/catalog/30/ Also available from http://strawberry-linux.com/catalog/items?code=18128 |
| SFE-WRL-09819 | Sparkfun Switch Science |
2,619 yen | http://www.switch-science.com/catalog/344/ |
Open Device Manager (Windows)
Open Device Manager. In Windows 7, you can open it from “Control Panel” -> “System and Security” -> “System” -> “Device Manager”. If “Computer” is on the desktop, the quickest way is probably to open it from right-click -> “Properties (R)” -> “Device Manager”.
Connecting the XBee-USB Explorer
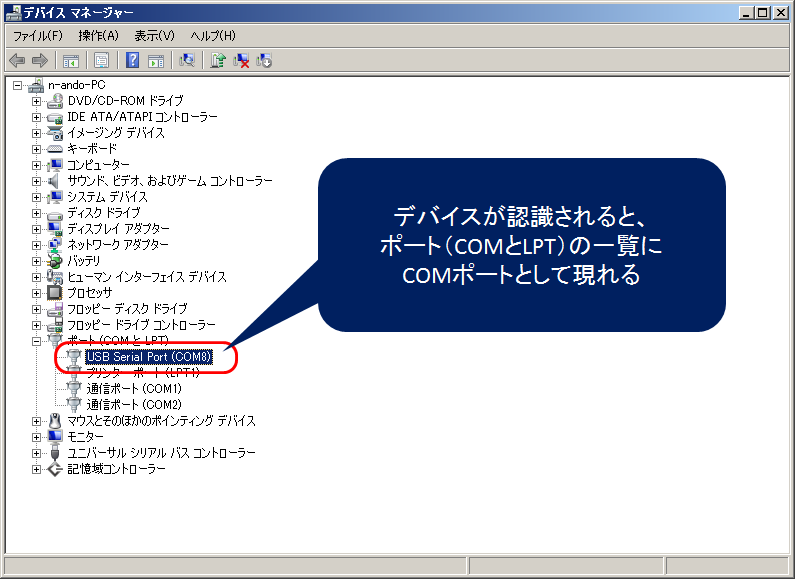
Connect the XBee-USB Explorer to a USB port on the PC. When connecting it for the first time, it may take some time for the device to be recognized and for the device driver to be installed. After the device driver installation is complete, it appears as a COM port in Device Manager as shown below. At this time, remember which COM port it has been assigned to. (In the example below, it was assigned to COM8.)
If the Device Is Not Recognized
If the driver is unfortunately not installed automatically, for an XBee-USB Explorer using an FTDI chip (FT232B, etc.), download and install the driver directly from FTDI.
- FTDI driver download site: http://www.ftdichip.com/Drivers/VCP.htm
For the Akizuki and Sparkfun XBee-USB Explorers, driver installation was not required on Windows 7.
Configuring the XBee Module
XBee modules are broadly divided into parent units and child units, and whether an XBee module is used as a parent unit or a child unit is configured from the PC via the XBee-USB Explorer.
Each XBee network always requires one parent unit, “Coordinator”, and multiple child units are connected under the parent unit. On the other hand, immediately after purchase, XBee modules are configured as child units, “Router”, so when creating an XBee network for the first time, one of them must be set as the parent unit, “Coordinator”.
To configure an XBee module, you need to download the configuration software called X-CTU from Digi’s web page and install it on the PC.
Downloading and Installing X-CTU
Go to Digi’s X-CTU download site (if the link is broken due to updates or other reasons, please let us know via the ML or similar means).
Click the Diagnostics, Utilities and MIBs item on the page. A link to the X-CTU installer appears, so click it to download. (It is about 63 MB.)
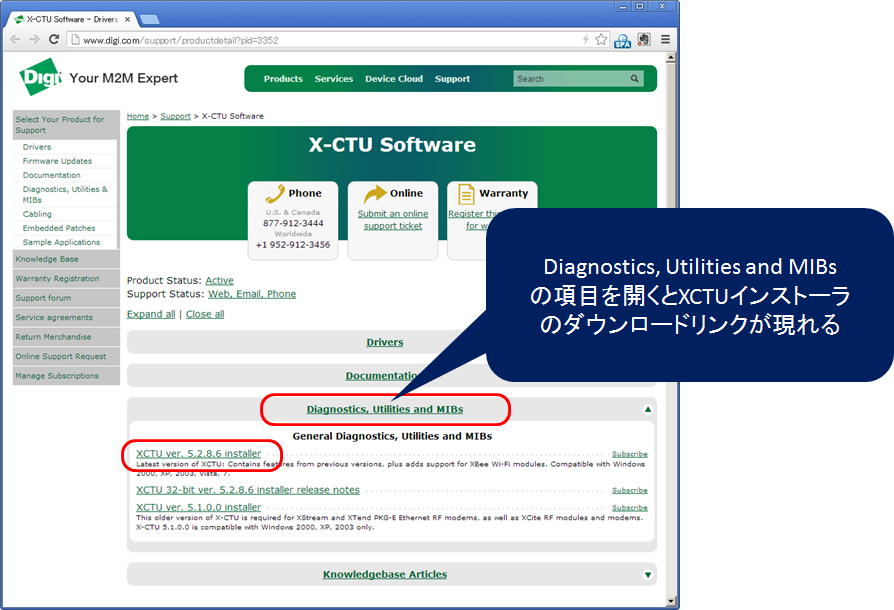
Click and run the downloaded executable file 40003002_C.exe (this file name may change due to version upgrades, etc.), and the installer will start. Follow the instructions to complete the installation.
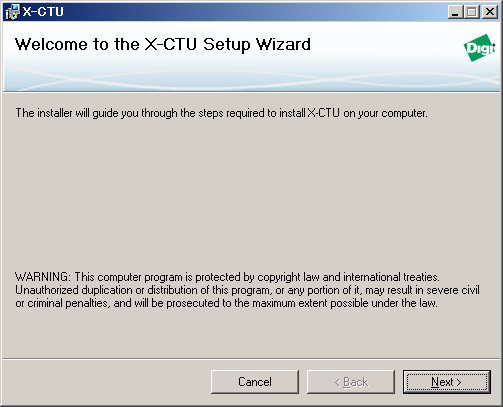
Finally, you may be asked whether to update the firmware, but skip it if it is not especially necessary. (It takes quite a bit of time.)
Starting X-CTU
After installation is complete, start X-CTU. After startup, a screen like the following is displayed.
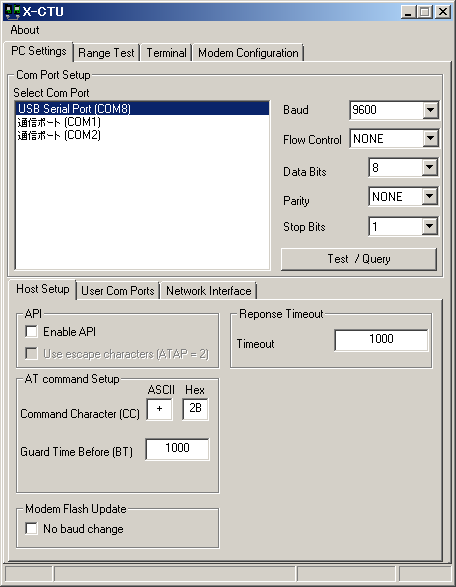
Select “PC-Settings” in X-CTU. In Select Com Port within the tab, select the COM port to which the XBee-USB Explorer device is connected. (In this example, it is COM8.) If you do not know the COM port to which the XBee-USB Explorer device is connected, temporarily disconnect the device from the PC and observe which COM port disappears in Device Manager, or restart X-CTU and find the COM port that disappeared, to identify the corresponding COM port.
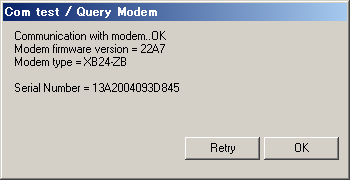
After selecting the target COM port in Select Com Port, press the Test/Query button at the bottom right. It communicates with the XBee and displays the serial number and other information as shown below.
Loading Firmware Configuration Information
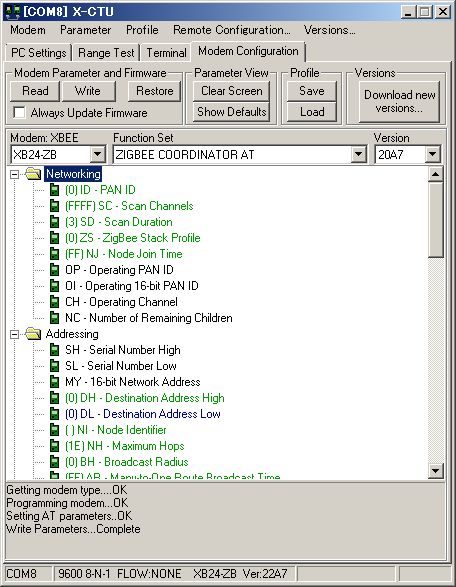
Next, load the firmware information to check the current configuration of the connected XBee. Click the “Modem Configuration” tab in X-CTU, then click the “Read” button in the Modem Parameter and Firmware area below. Then communication with the XBee starts, and after a short while, the XBee configuration information is displayed in a tree in the lower area as shown below.
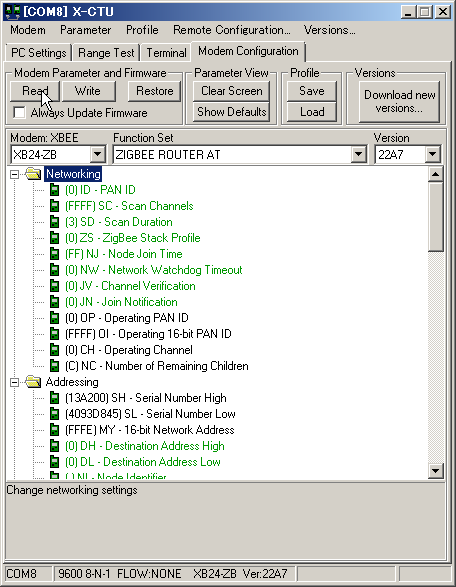
The XBee module type is displayed in the “Modem” section, the firmware type is displayed in the “Function Set” section, and the firmware version is displayed in “Version”.
The “Function Set” section is probably ZIGBEE ROUTER AT, which means that this XBee module is configured as a “Router”, that is, a child unit.
Changing from Router to Coordinator
Here, change the child unit “Router” to the parent unit “Coordinator”. To change it to the parent unit, that is, “Coordinator”, select ZIGBEE COORDINATOR AT from the pull-down menu.
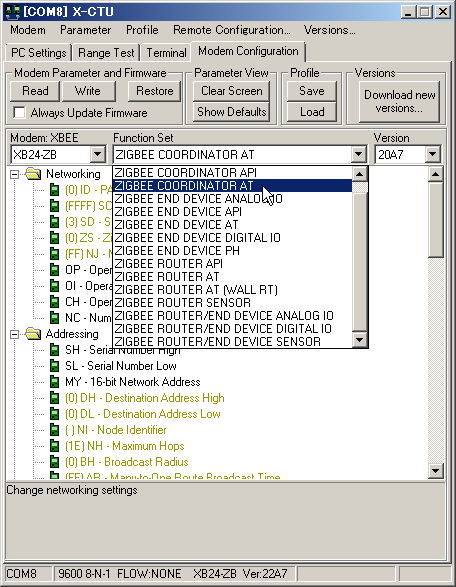
Press the “Write” button to start writing to the XBee. Writing completes in about 1 to 2 minutes.
Difference Between AT and API
When selecting the firmware earlier, you may have noticed that in addition to ZIGBEE COORDINATOR AT, there was firmware called ZIGBEE COORDINATOR API. Firmware with AT means the type of firmware that configures the XBee using AT commands, while firmware with API means the type of firmware that configures the XBee via an API.
If XBee Stops Responding Completely
If XBee stops responding completely, forcibly overwrite the firmware and restore it to the factory state. Follow the procedure below to restore it to the factory default state.
- Remove XBee from the XBee-USB Explorer device
- In that state, connect the XBee-USB Explorer device to the PC
- Start X-CTU
- Click the “Modem Configuration” tab
- Click the “Always update firmware” checkbox
- Select the appropriate “Modem” type
- Select the appropriate “Function Set”
- Click “Write”. After a short while, an error dialog appears, so insert XBee into the XBee-USB Explorer device
- Firmware writing starts