
tutorial (raspberry pi mouse, python, windows, reinforcement month edition)
✏️ Edit this page on GitHub#contents
Introduction
This page explains the procedure for creating a component to control a Raspberry Pi Mouse running in a simulator.
Downloading the Materials
First, download the materials.
Extract the ZIP file using Lhaplus or a similar tool.
Workshops may sometimes be conducted in environments without Internet access. In that case, the files are included on the distributed USB memory device.
Simulator
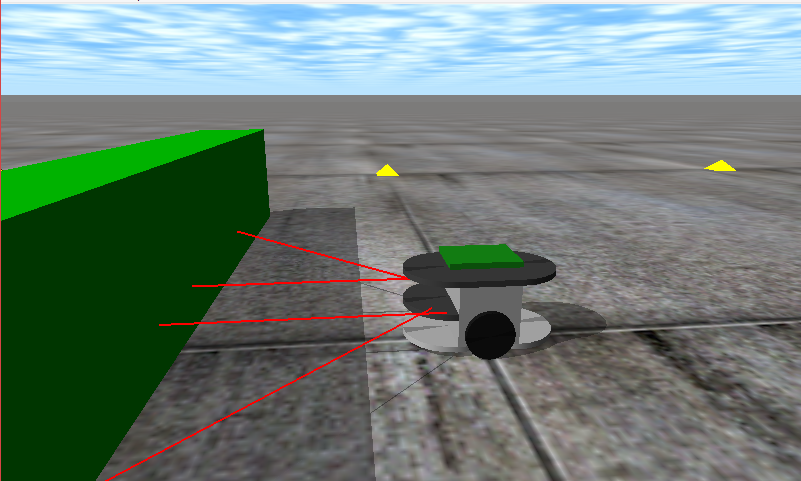
The simulator was developed using a physics engine called Open Dynamics Engine (ODE) and the drawing library (drawstuff) included with ODE.
Since it runs wherever OpenGL is available, it should work in most environments.
It simulates the following robot, the Raspberry Pi Mouse.
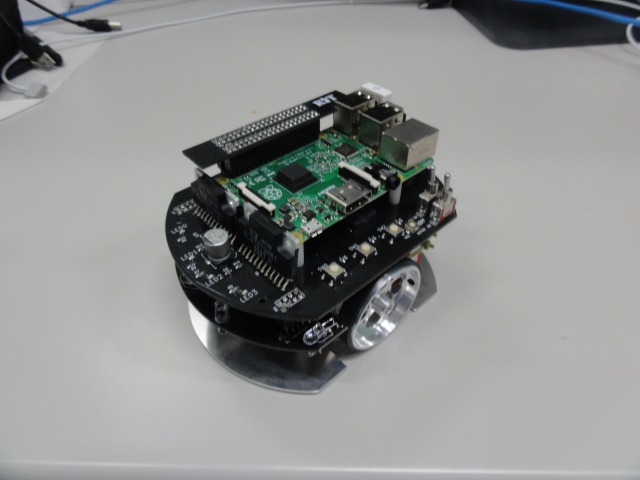
The simulator reproduces not only the dynamics calculations and contact responses of the Raspberry Pi Mouse, but also distance sensor data with values close to those of the actual robot.
RT Component to Be Created
- RobotController Component
This component connects to the RaspberryPiMouseSimulator component and controls the robot in the simulator.
Creating the RobotController Component
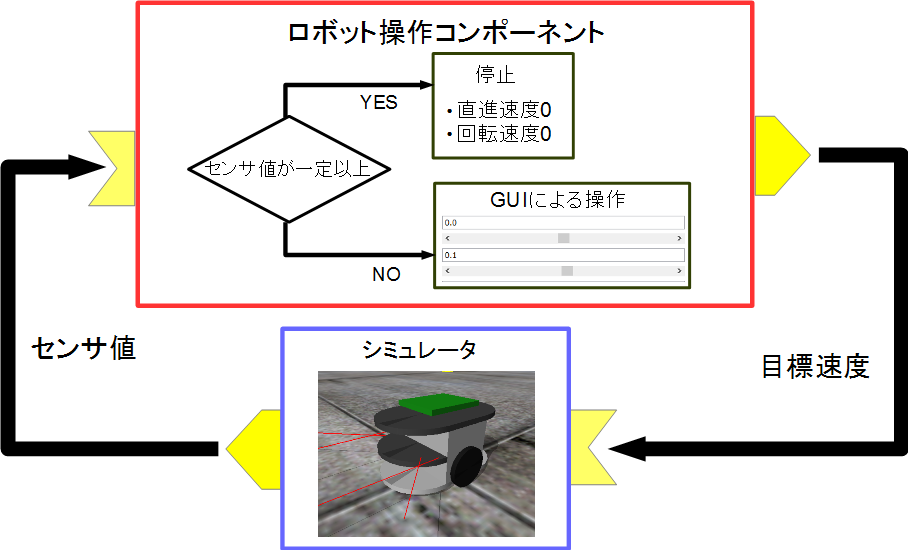
You will create a component that controls the robot in the simulator using a GUI (slider) and automatically stops when a sensor value exceeds a specified threshold.
Creation Procedure
The creation procedure is as follows.
- Verify the development environment
- Define the component specifications
- Generate template source code using RTC Builder
- Edit the source code
- Verify component operation
Verifying the Development Environment
The following environment is assumed.
- OS: Windows 8.1 (Windows 7 and 10 are also supported)
- OpenRTM-aist: 1.2.2-Release
- Python 3.8
- Python editor
- IDLE (included with Python)
- PythonWin
- PyScripter
- PyDev
- Visual Studio Code
Component Specifications
RobotController has an OutPort for outputting target velocity, an InPort for receiving sensor values, and configuration parameters for setting the target velocity and the sensor threshold for stopping.
| Component Name | RobotController |
|---|---|
| InPort | |
| Port Name | in |
| Type | TimedShortSeq |
| Description | Sensor values |
| OutPort | |
| Port Name | out |
| Type | TimedVelocity2D |
| Description | Target velocity |
| Configuration | |
| Parameter Name | speed_x |
| Type | double |
| Default Value | 0.0 |
| Constraint | -1.5<x<1.5 |
| Widget | slider |
| Step | 0.01 |
| Description | Forward velocity setting |
| Configuration | |
| Parameter Name | speed_r |
| Type | double |
| Default Value | 0.0 |
| Constraint | -2.0<x<2.0 |
| Widget | slider |
| Step | 0.01 |
| Description | Rotational velocity setting |
| Configuration | |
| Parameter Name | stop_d |
| Type | int |
| Default Value | 30 |
| Description | Sensor value threshold for stopping |
About the TimedVelocity2D Type
The TimedVelocity2D type is used to store the movement velocity of a mobile robot on a two-dimensional plane.
     struct Velocity2D
     {
           /// Velocity along the x axis in metres per second.
           double vx;
           /// Velocity along the y axis in metres per second.
           double vy;
           /// Yaw velocity in radians per second.
           double va;
     };


     struct TimedVelocity2D
     {
           Time tm;
           Velocity2D data;
     };
This data type stores the X-axis velocity vx, Y-axis velocity vy, and rotational velocity around the Z-axis va.
vx, vy, and va represent velocities in the robot-centered coordinate system.
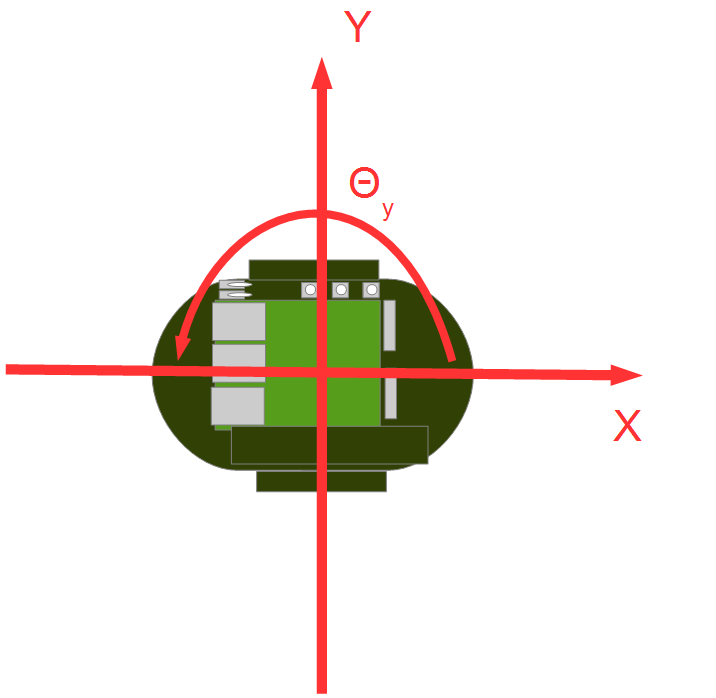
vx is the velocity in the X direction, vy is the velocity in the Y direction, and va is the angular velocity around the Z axis.
For robots such as the Raspberry Pi Mouse, which have two wheels mounted on the left and right sides, vy is assumed to be 0 because lateral slipping is ignored.
The robot is controlled by specifying the forward velocity vx and rotational velocity va.
About Distance Sensor Data
The distance sensor of the Raspberry Pi Mouse outputs larger values as an object gets closer.
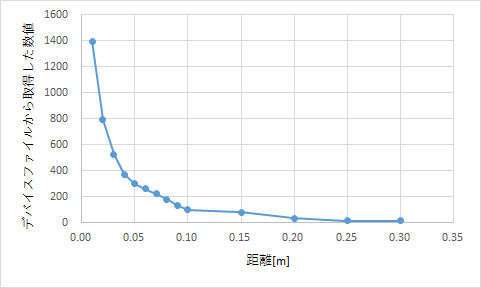
| Value Obtained from Device File | Actual Distance [m] |
|---|---|
| 1394 | 0.01 |
| 792 | 0.02 |
| 525 | 0.03 |
| 373 | 0.04 |
| 299 | 0.05 |
| 260 | 0.06 |
| 222 | 0.07 |
| 181 | 0.08 |
| 135 | 0.09 |
| 100 | 0.10 |
| 81 | 0.15 |
| 36 | 0.20 |
| 17 | 0.25 |
| 16 | 0.30 |
The simulator reproduces these values.
The RobotController component implements processing to automatically stop when these values exceed a specified threshold.
Generating Template Code for the RobotController Component
Template code for the RobotController component is generated using RTCBuilder.
Starting RTCBuilder
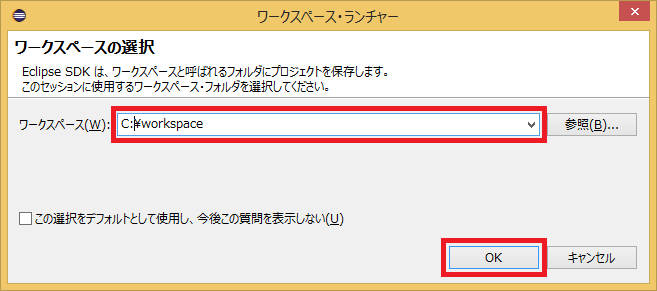
In Eclipse, the folder used for development work is called a “Workspace,” and in principle all generated files are stored under this folder.
The workspace can be created anywhere as long as it is accessible, but this tutorial assumes the following workspace.
- C:\workspace
First, start Eclipse.
For Windows 8.1, select “Start” > “Apps View (lower-right arrow)” > “OpenRTM-aist 1.1.2” > “OpenRTP”.
When Eclipse starts, you will be asked to specify the workspace location. Specify the workspace described above.
Then the following Welcome page will be displayed.
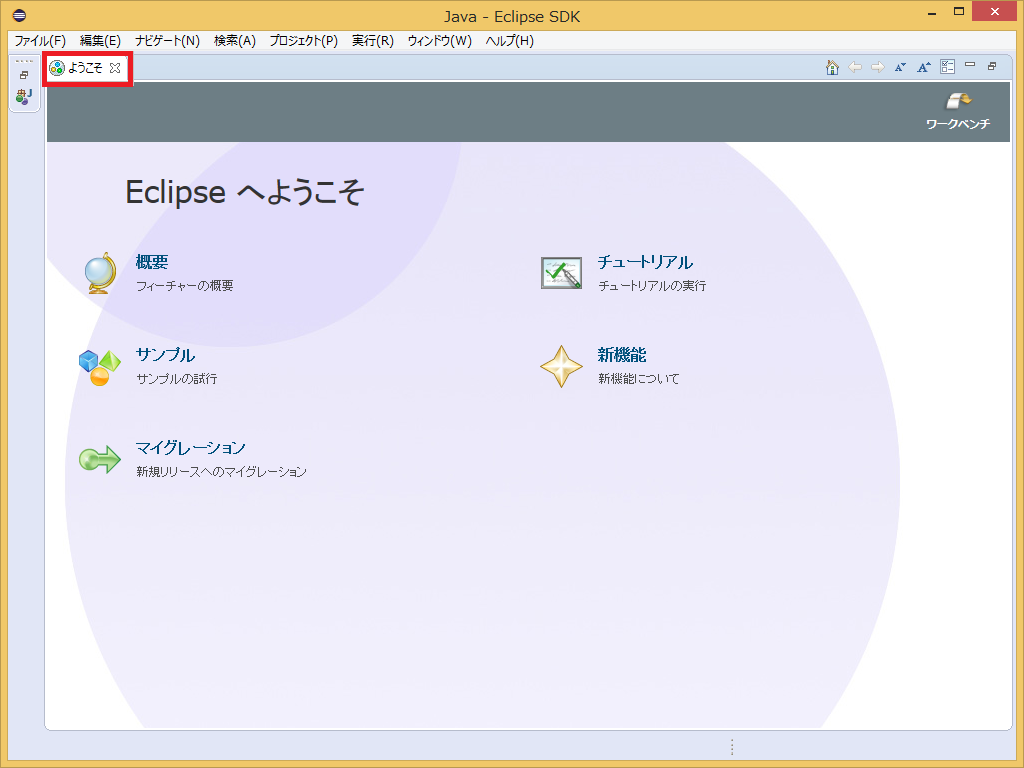
The Welcome page is not needed now, so click the “×” button in the upper-left corner to close it.
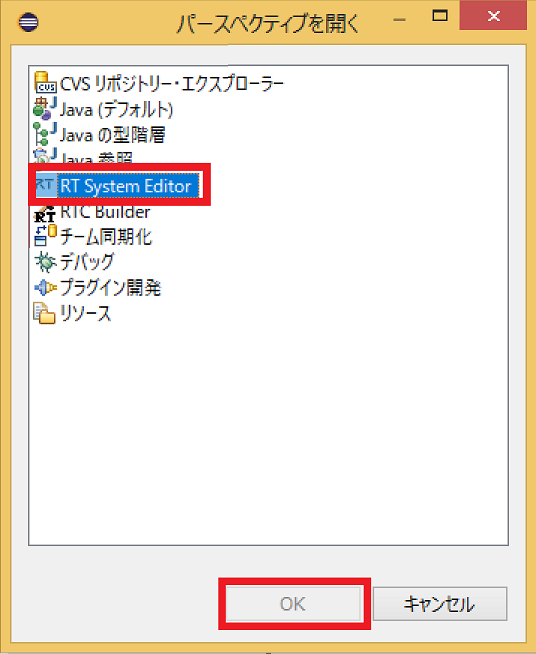
Click the [Open Perspective] button in the upper-right corner.
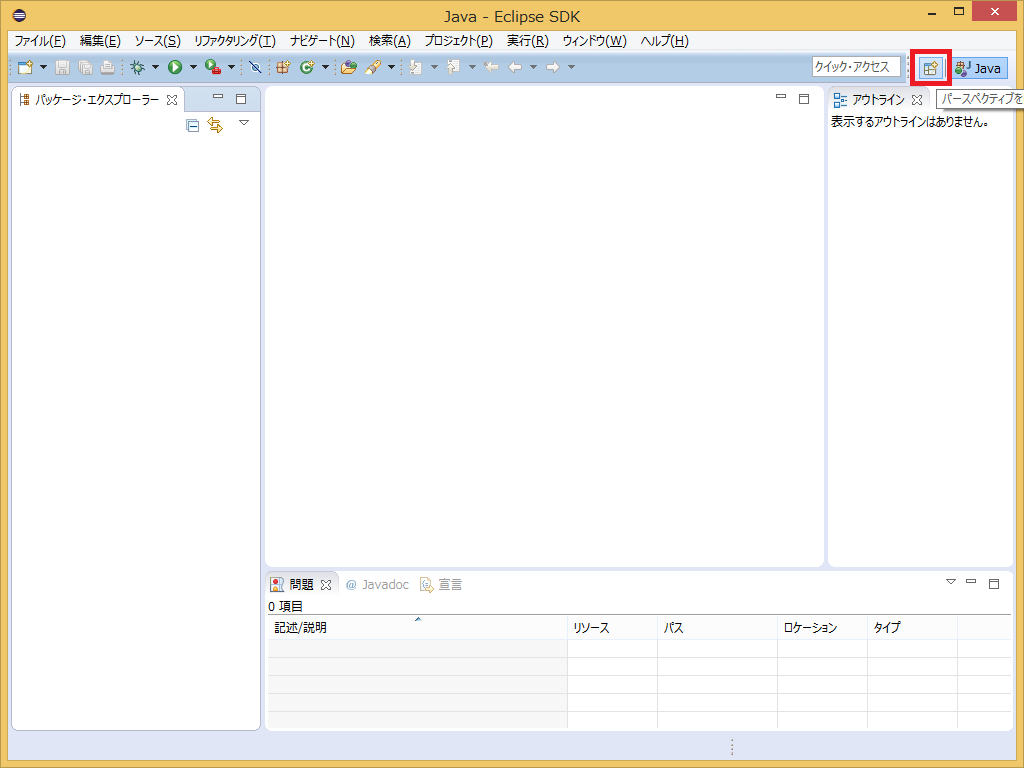
Select “RTC Builder” to start RTCBuilder. The RTCBuilder icon (“Hammer and RT”) will appear in the menu bar.
Creating a New Project
To create the RobotController component, you must first create a new project in RTCBuilder.
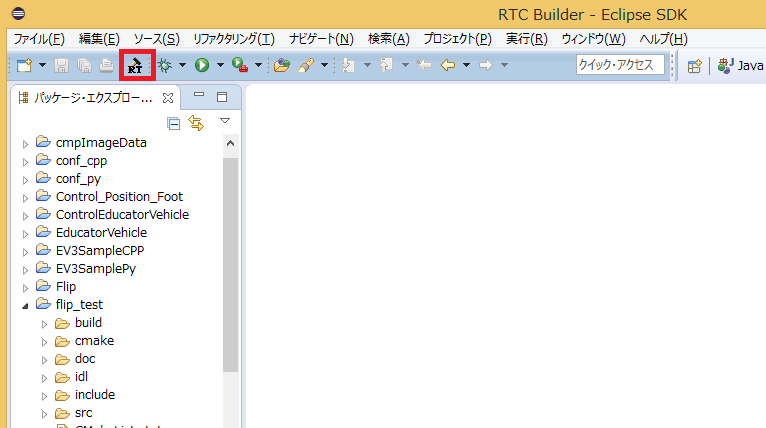
Click the [Open New RTCBuilder Editor] icon in the upper-left corner.
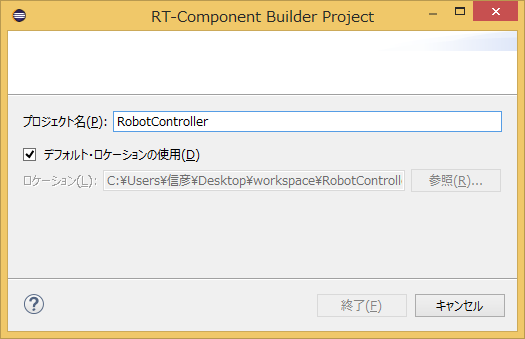
Enter the project name to create (in this example, RobotController) in the “Project Name” field and click the [Finish] button.
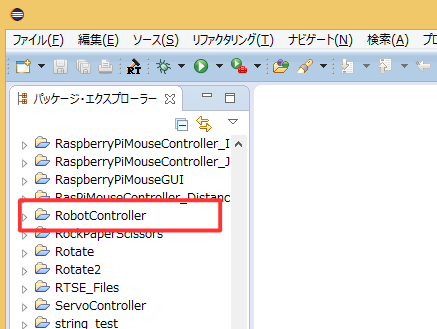
A project with the specified name will be generated and added to the Package Explorer.
Within the generated project, an RTC profile XML file (RTC.xml) with default values is automatically created.
Starting the RTC Profile Editor
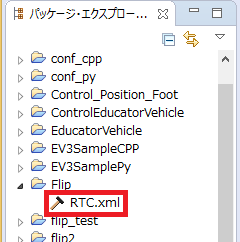
When RTC.xml is generated, the RTCBuilder editor associated with this project should open automatically.
If it does not start, double-click RTC.xml in the Package Explorer.
Entering Profile Information and Generating Code
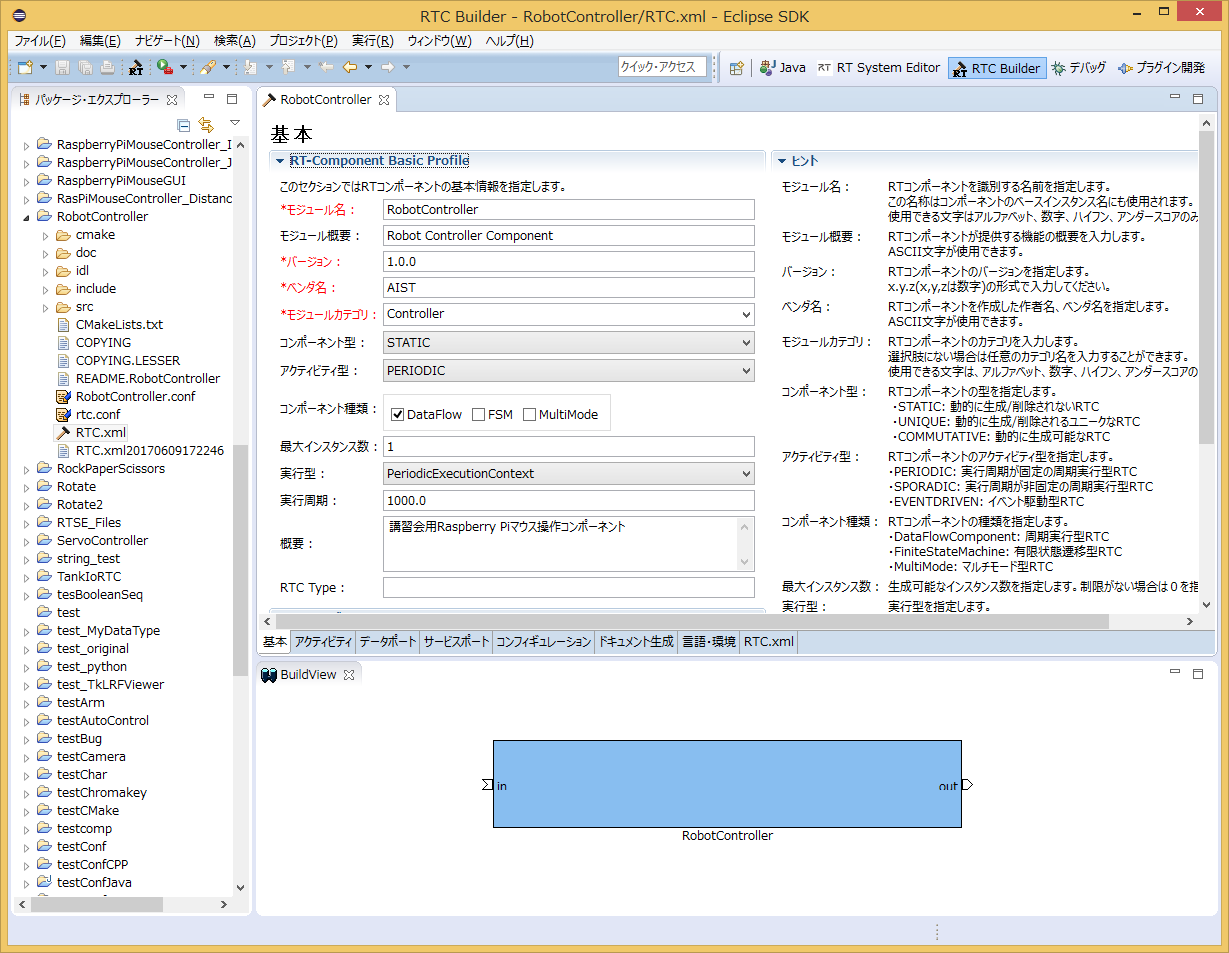
First, select the leftmost “Basic” tab and enter the basic information.
In addition to the RobotController component name defined earlier, enter a description, version number, and other information.
Fields with red labels are required. All other fields can remain at their default values.
- Module Name: RobotController
- Module Description: Optional (Robot Controller component)
- Version: Optional (1.0.0)
- Vendor: Optional
- Module Category: Optional (Controller)
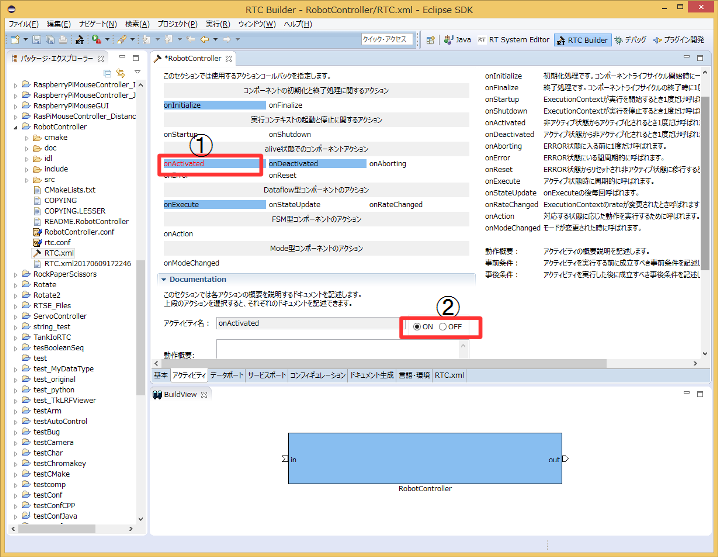
Next, select the “Activity” tab and specify the action callbacks to use.
The RobotController component uses the onActivated(), onDeactivated(), and onExecute() callbacks.
As shown below, click onActivated (①) and then select [ON] using the radio button (②).
Perform the same procedure for onDeactivated and onExecute.
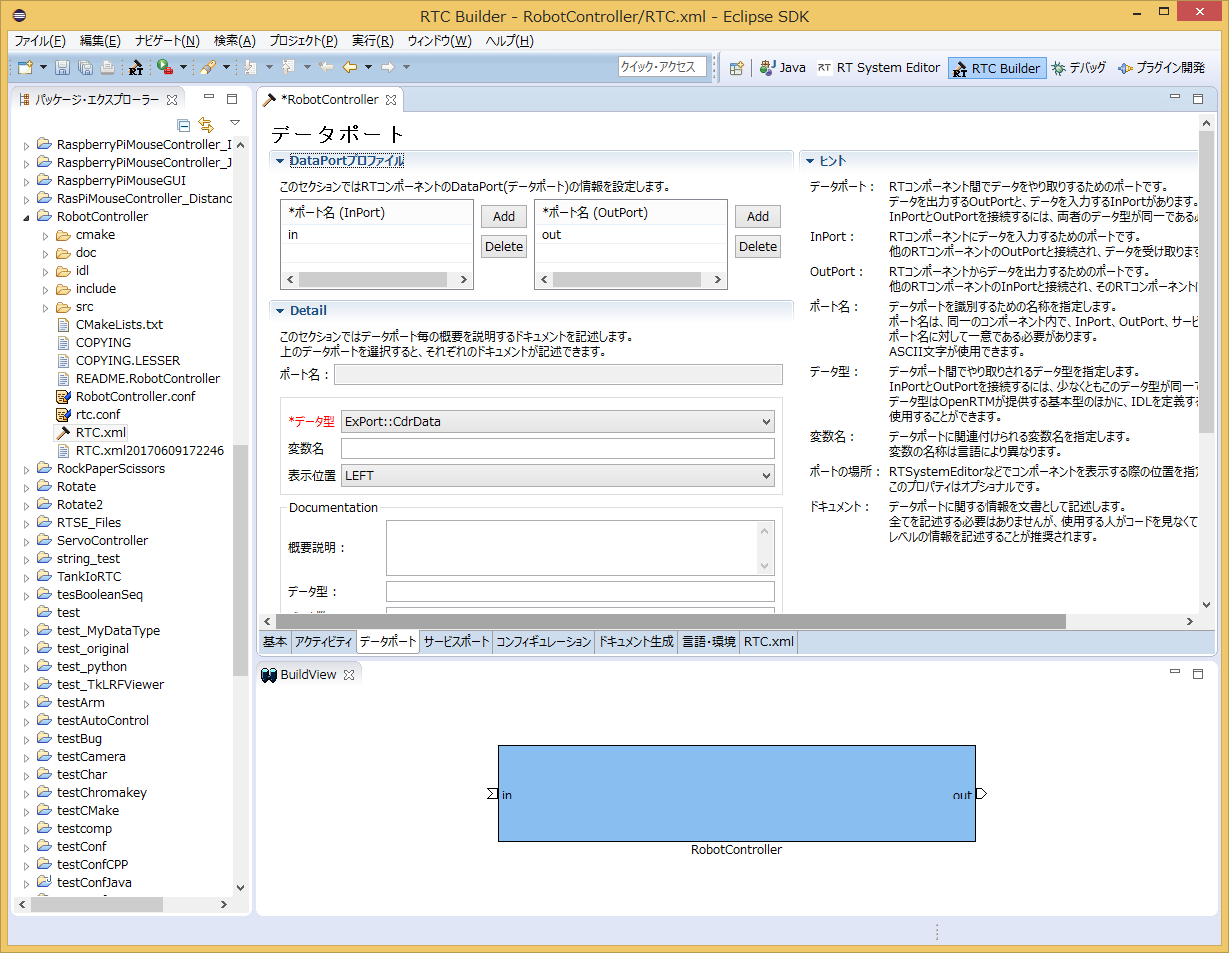
Next, select the “Data Ports” tab and enter the data port information.
Enter the information according to the specifications defined earlier.
Variable names and display positions are optional and may be left unchanged.
- InPort Profile:
- Port Name: in
- Data Type: TimedShortSeq
- OutPort Profile:
- Port Name: out
- Data Type: TimedVelocity2D
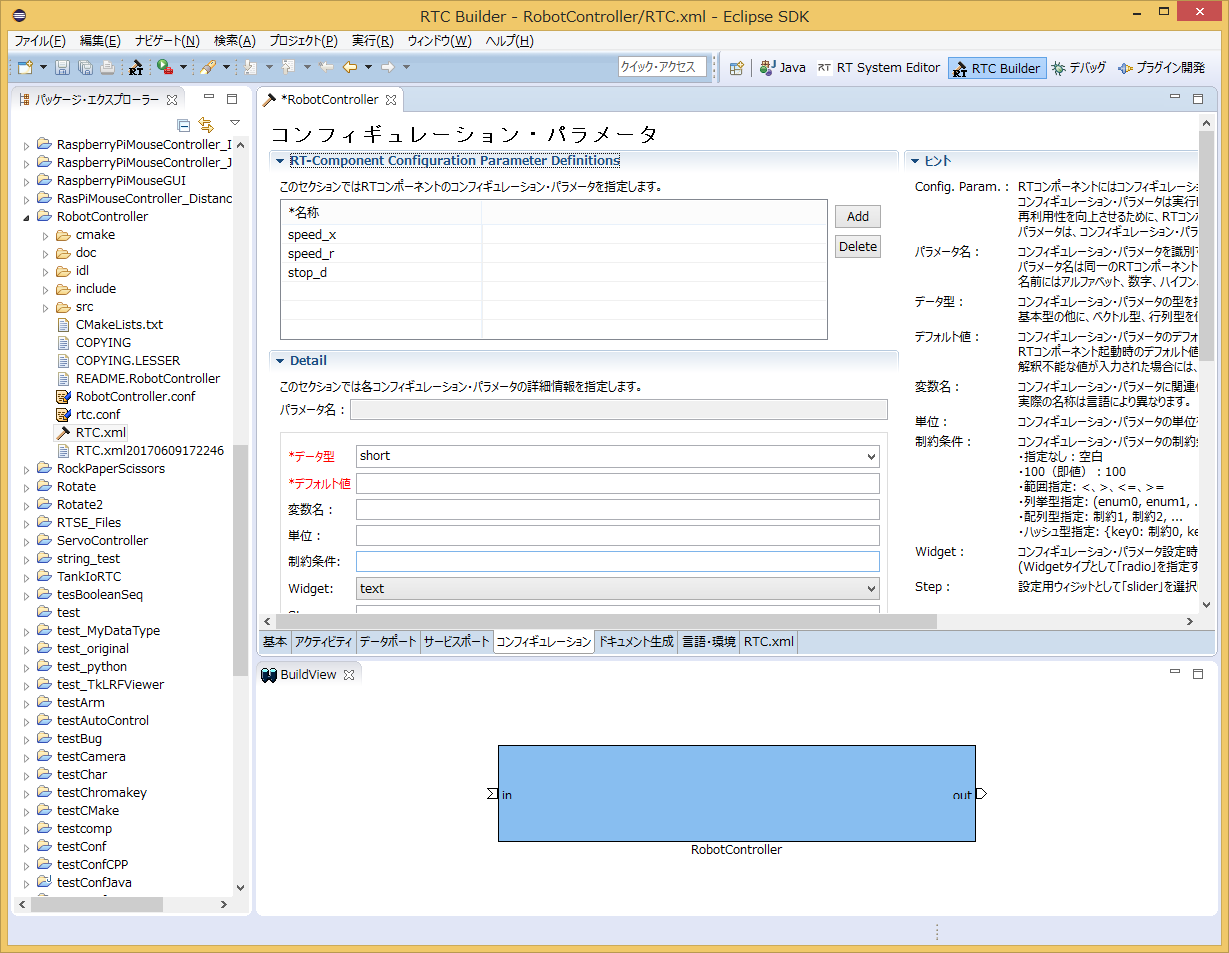
Next, select the “Configuration” tab and enter the Configuration information according to the specifications defined earlier.
Constraint conditions and Widgets are used by RTSystemEditor when displaying component configuration parameters, allowing values to be changed through GUI elements such as sliders, spin buttons, and radio buttons.
The forward velocity speed_x and rotational velocity speed_r will be adjustable using sliders.
- speed_x
- Name: speed_x
- Data Type: double
- Default Value: 0.0
- Constraint: -1.5<:x<:1.5
- Widget: slider
- Step: 0.01
- speed_r
- Name: speed_r
- Data Type: double
- Default Value: 0.0
- Constraint: -2.0<:x<:2.0
- Widget: slider
- Step: 0.01
- stop_d
- Name: stop_d
- Data Type: int
- Default Value: 30
- Widget: text
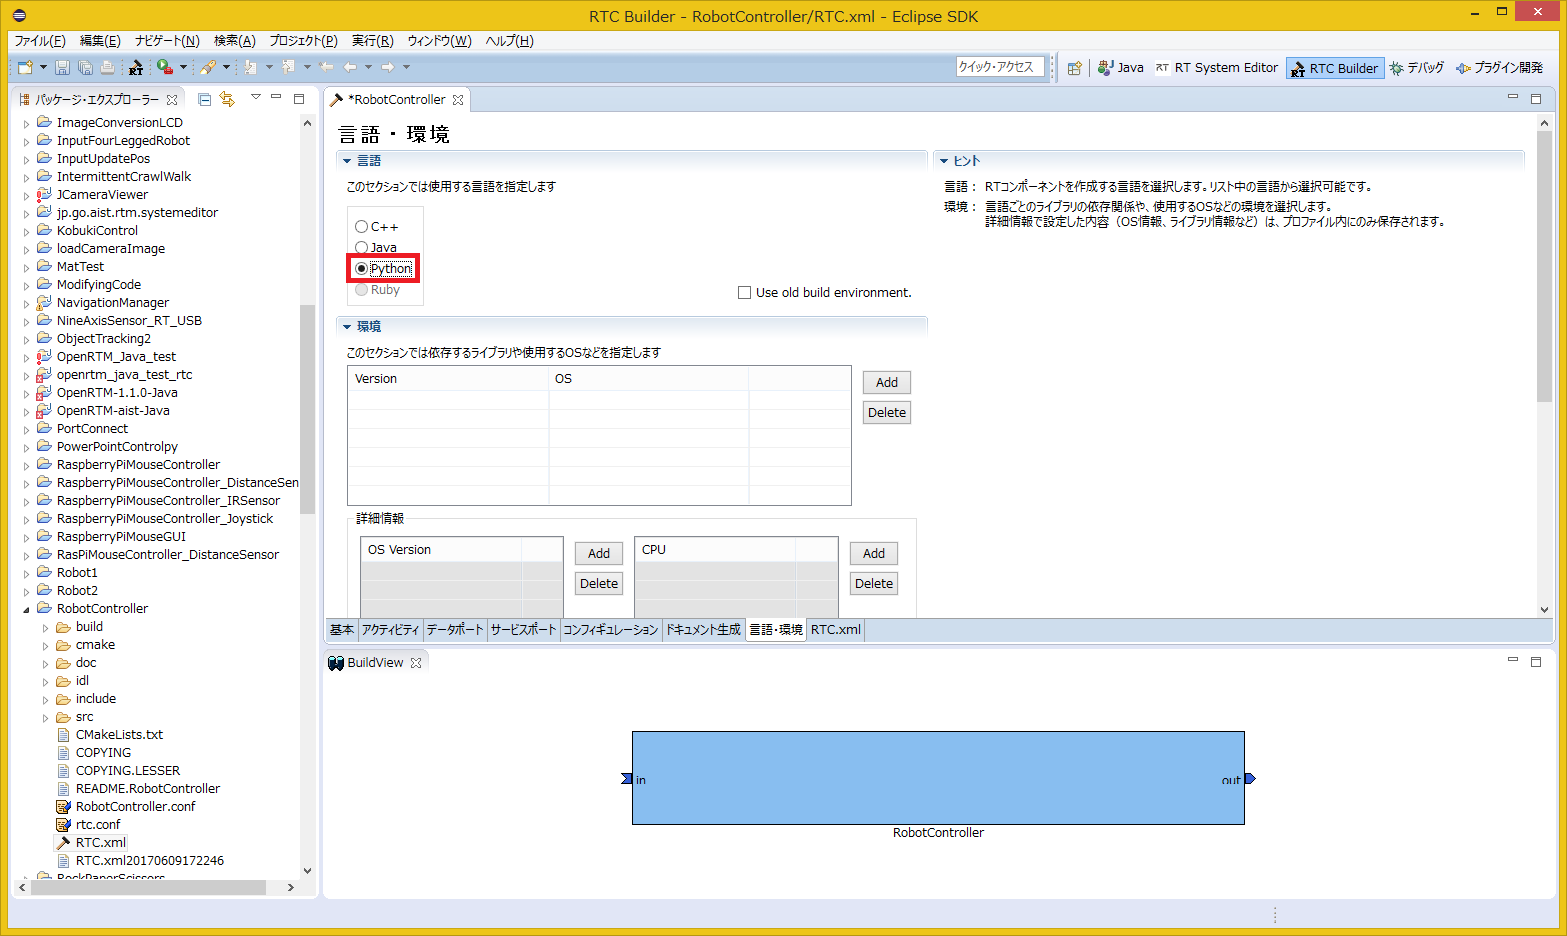
Next, select the “Language / Environment” tab and choose the programming language.
In this tutorial, select Python as the language.
Note that no default value is set for the language/environment field. If you forget to specify a language, code generation will fail, so be sure to select one.
Finally, return to the “Basic” tab and click the [Generate Code] button to generate the component template code.
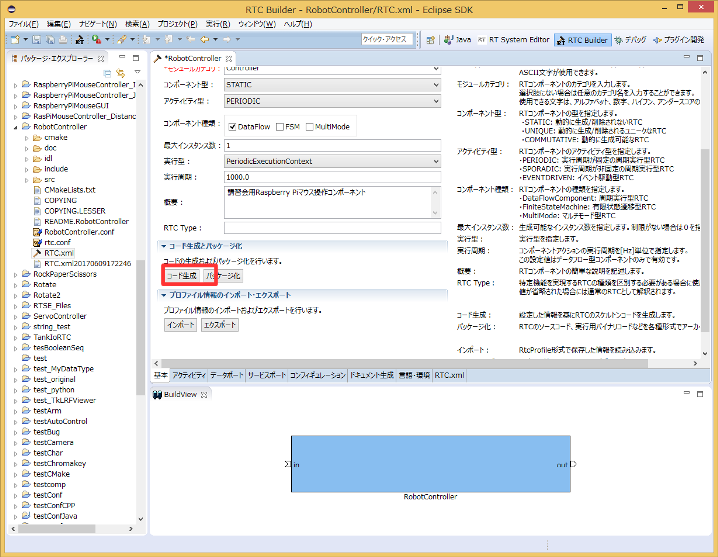
* The generated code files are created inside the workspace folder specified when Eclipse was started. You can check the current workspace from [File] > [Switch Workspace…].
Editing the Source Code
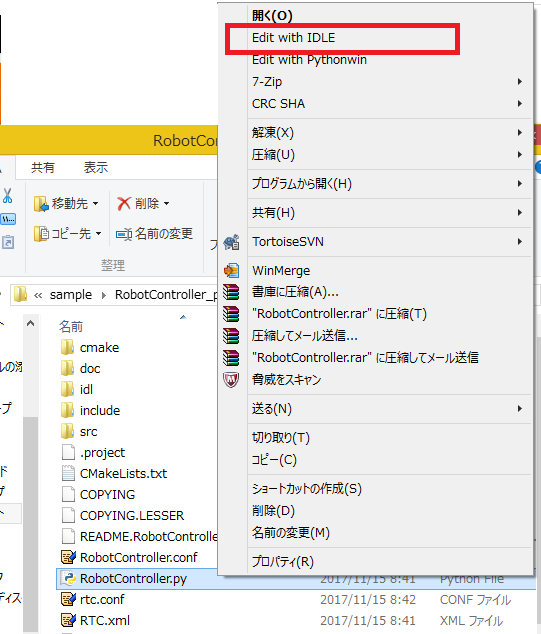
Open <Workspace Directory>/RobotController/RobotController.py with a Python editor and edit it.
If you are using IDLE, which is included with Python, right-click the file and select Edit with IDLE.
Modifying Variable Initialization
If you are using RTC Builder included with OpenRTM-aist 1.1.2, you must modify the variable initialization section.
(This issue is planned to be fixed in OpenRTM-aist 1.2.0.)
First, modify the initialization of the self._d_in variable in the __init__ function.
 	def __init__(self, manager):
 		OpenRTM_aist.DataFlowComponentBase.__init__(self, manager)

 		#in_arg = [None] * ((len(RTC._d_TimedShortSeq) - 4) / 2) ← Delete
 		#self._d_in = RTC.TimedShortSeq(*in_arg) ← Delete
 		#Add the following line
 		self._d_in = RTC.TimedShortSeq(RTC.Time(0,0),[])
Next, modify the initialization of the self._d_out variable.
 		#out_arg = [None] * ((len(RTC._d_TimedVelocity2D) - 4) / 2) ← Delete
 		#self._d_out = RTC.TimedVelocity2D(*out_arg) ← Delete
 		#Add the following line
 		self._d_out = RTC.TimedVelocity2D(RTC.Time(0,0),RTC.Velocity2D(0.0,0.0,0.0))
This completes the modification.
Implementing Activity Processing
In the RobotController component, the configuration parameters (speed_x and speed_y) are controlled with sliders, and their values are output from the OutPort (out) as the target velocity.
Values input from the InPort (in) are stored in a variable, and if the values exceed a specified threshold, the robot stops.
The processing performed in onActivated(), onExecute(), and onDeactivated() is shown below.
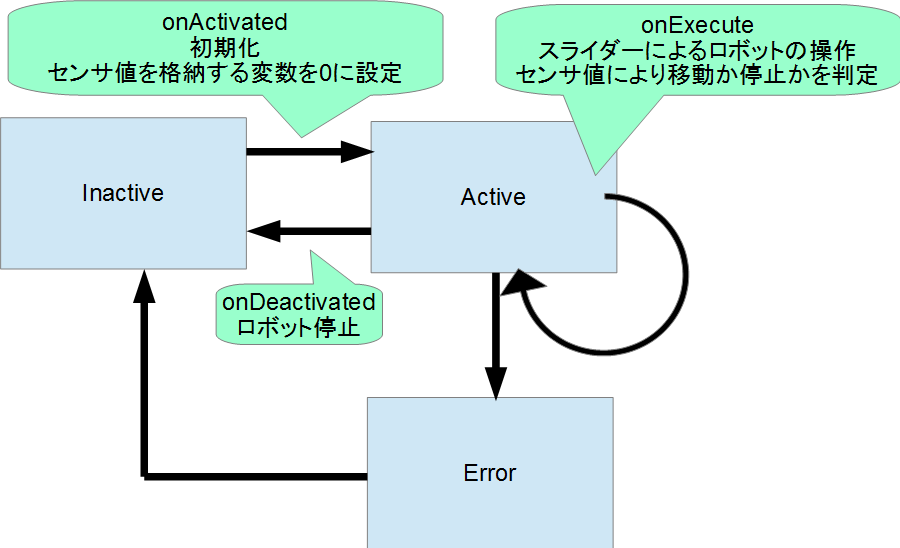
Implement onActivated(), onDeactivated(), and onExecute() as follows.
 	def onActivated(self, ec_id):
 		#センサー値初期化
 		self.sensor_data = [0,0,0,0]
 		return RTC.RTC_OK
 	def onDeactivated(self, ec_id):
 		#ロボットを停止する
 		self._d_out.data.vx = 0
 		self._d_out.data.va = 0
 		self._outOut.write()
 		return RTC.RTC_OK
 	def onExecute(self, ec_id):
 		#入力データの存在確認
 		if self._inIn.isNew():
 			data = self._inIn.read()
 			#この時点で入力データがm_inに格納される
 			#入力データを別変数に格納
 			self.sensor_data = data.data[:]
 		#前進するときのみ停止するかを判定
 		if self._speed_x[0] > 0:
 			for d in self.sensor_data:
 				#センサ値が設定値以上か判定
 				if d > self._stop_d[0]:
 					#センサ値が設定値以上の場合は停止
 					self._d_out.data.vx = 0
 					self._d_out.data.va = 0
 					self._outOut.write()
 					return RTC.RTC_OK

 		#設定値以上の値のセンサが無い場合はコンフィギュレーションパラメータの値で操作
 		self._d_out.data.vx = self._speed_x[0]
 		self._d_out.data.va = self._speed_r[0]
 		self._outOut.write()

 		return RTC.RTC_OK
Verifying Operation of the RobotController Component
Connect the created RobotController to the simulator component and verify its operation.
Download the RaspberryPiMouseSimulator component from the following link.
Extract the ZIP file using Lhaplus or a similar tool.
Workshops may sometimes be conducted in environments without Internet access. In that case, the files are included on the distributed USB memory device.
Starting NameService
Start the Name Service used to register component references.
Select “Start” > “Apps View (lower-right arrow)” > “OpenRTM-aist 1.1.2”, then click “Start Naming Service”.
* If omniNames does not start even after clicking “Start Naming Service”, check whether the full computer name is set to 14 characters or fewer.
Starting the RobotController Component
Start the RobotController component.
Double-click and execute the RobotControllerComp.py file.
Starting the Simulator Component
This component starts by executing EXE/RaspberryPiMouseSimulatorComp.exe in the folder extracted from the previously downloaded file (RTM_Tutorial_2017.zip).
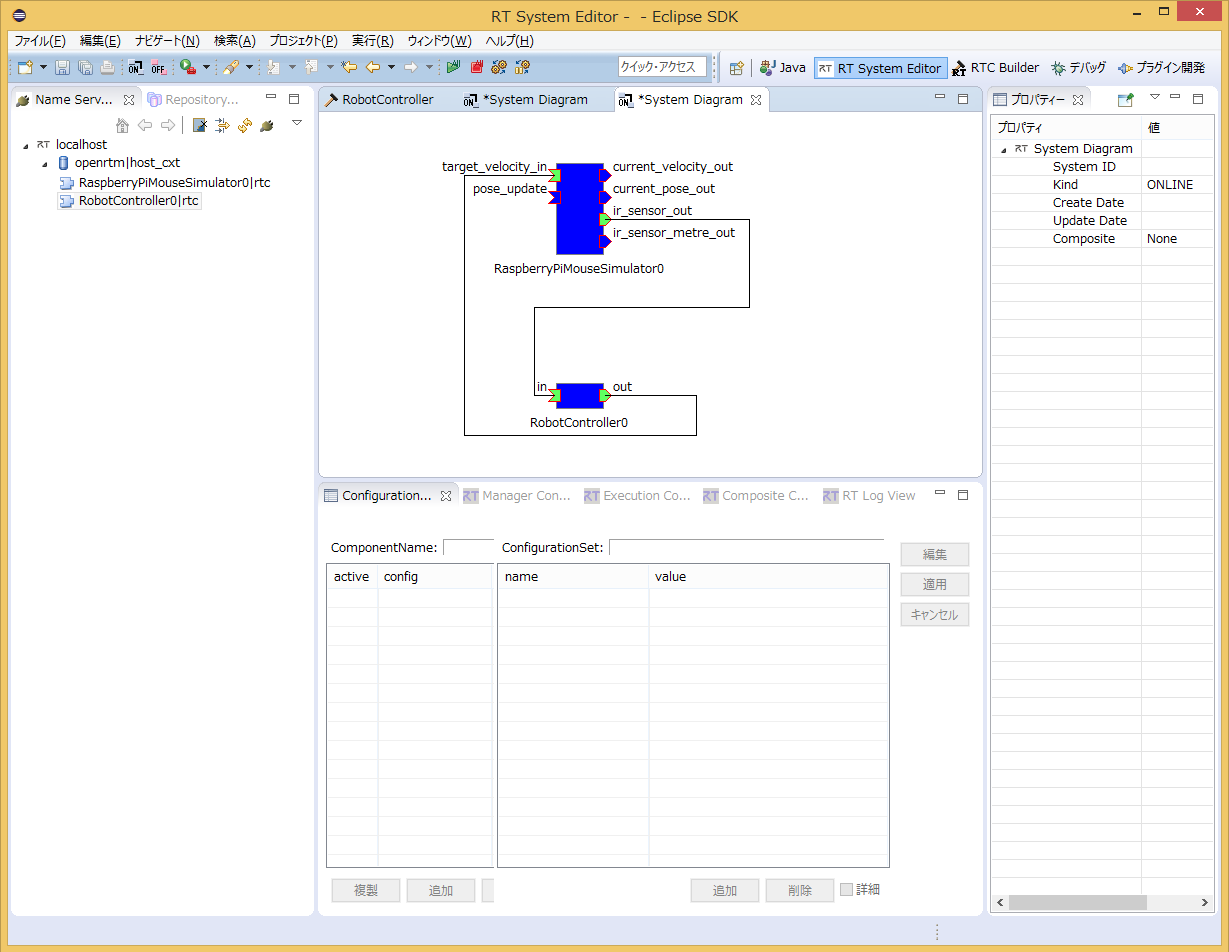
Connecting the Components
In RTSystemEditor, connect the RobotController component and RaspberryPiMouseSimulator component as shown below.
Activating the Components
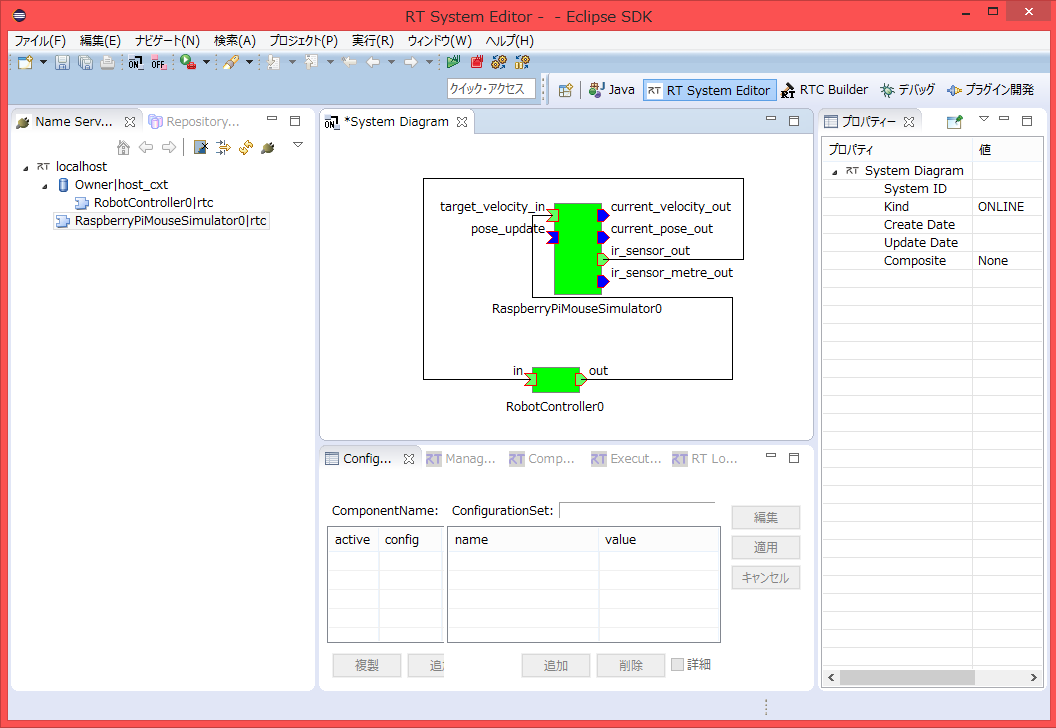
Click the [All Activate] icon at the top of RTSystemEditor to activate all components.
If activation succeeds, the components are displayed in yellow-green as shown below.
Operation Check
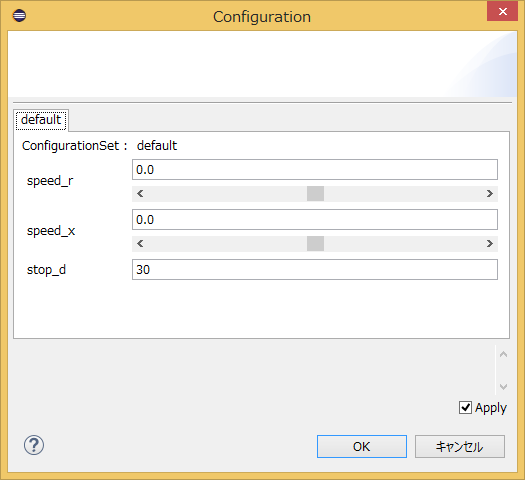
As shown below, you can change the configuration from the [Edit] button in the Configuration View.
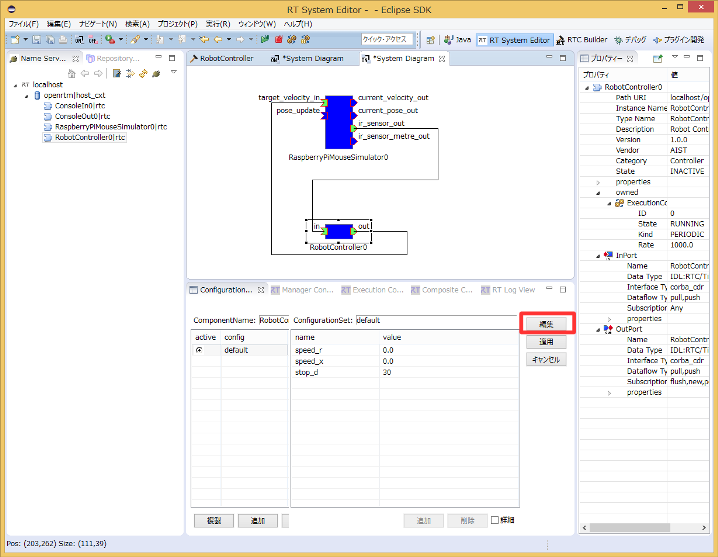
Operate the sliders and check whether you can control the [Raspberry Pi] Mouse in the simulator.
Operation Check on the Actual Robot
If an actual Raspberry Pi Mouse is available in the workshop, you can verify operation on the real robot.
The procedure is as follows.
- Turn on the Raspberry Pi Mouse
- Connect to the Raspberry Pi Mouse access point
- Connect the ports
- Activate the components
Turning On the Power
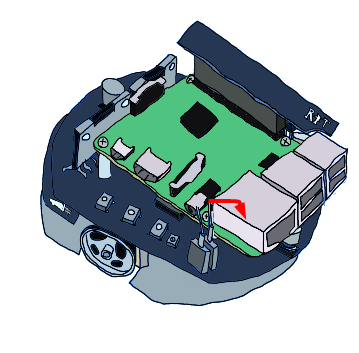
The Raspberry Pi Mouse has two power switches: one for the Raspberry Pi and one for the motors.
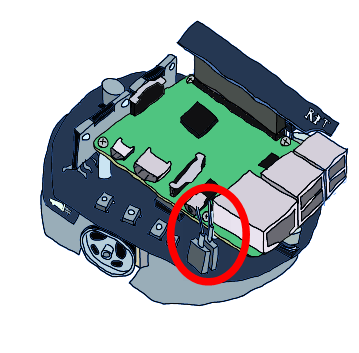
Turning on the inner power switch starts the Raspberry Pi.
Turning Off the Power
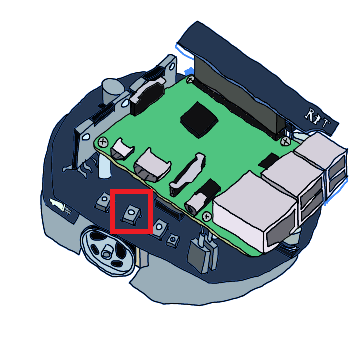
When turning off the Raspberry Pi, do not turn it off directly using the power switch.
Press and hold the center button among the three aligned buttons for a few seconds to start shutdown.
After Raspbian finishes shutting down in about 10 seconds, turn off the power switch.
Connecting to the Access Point
Refer to the following pages for how to connect to an access point.
The SSID and password are written on the label attached to the Raspberry Pi Mouse.
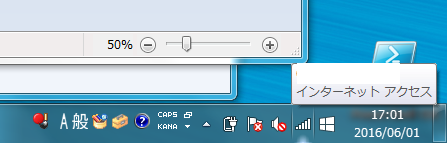
First, click the network icon in the lower-right corner.
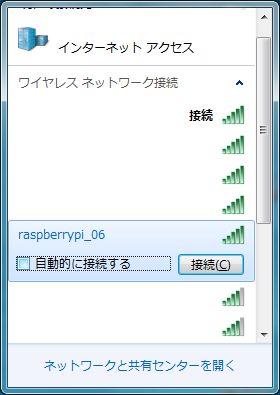
Next, select raspberrypi_*** from the list.
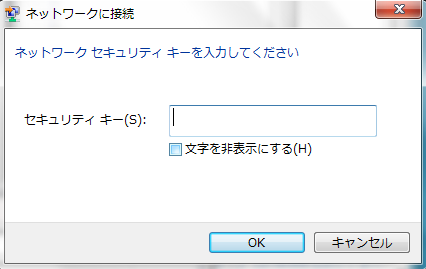
Enter the password.
When the network is switched, component registration with the Name Server or port connection may fail. Therefore, exit OpenRTP, the Name Server, and all components once.
If they were started after switching the network, there is no problem, so you do not need to exit them.
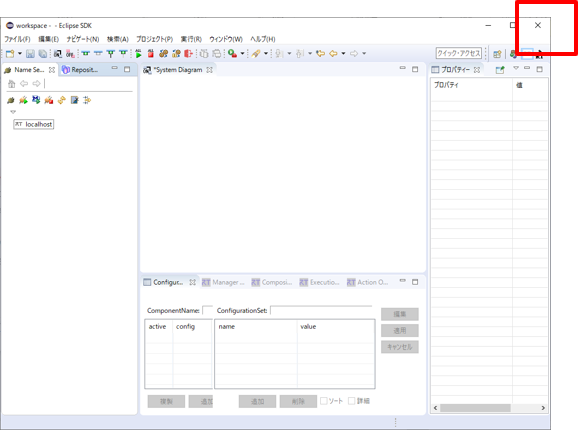
To exit OpenRTP, click the × button in the upper-right corner. You will be asked whether to save the system diagram; select Don’t Save.
Start OpenRTP by double-clicking the desktop shortcut.
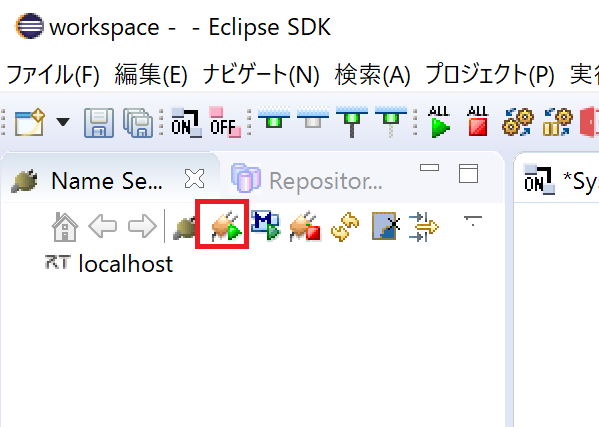
To restart the Name Server in RT System Editor, click the “Start Name Service” button again.
Starting the Name Server and RTC on Raspberry Pi
This step is required for the following Raspberry Pi Mouse with LiDAR. If you are using a Raspberry Pi Mouse without LiDAR, proceed to the next step.

Access the address 192.168.11.1 using a web browser such as Edge, Chrome, or Firefox.
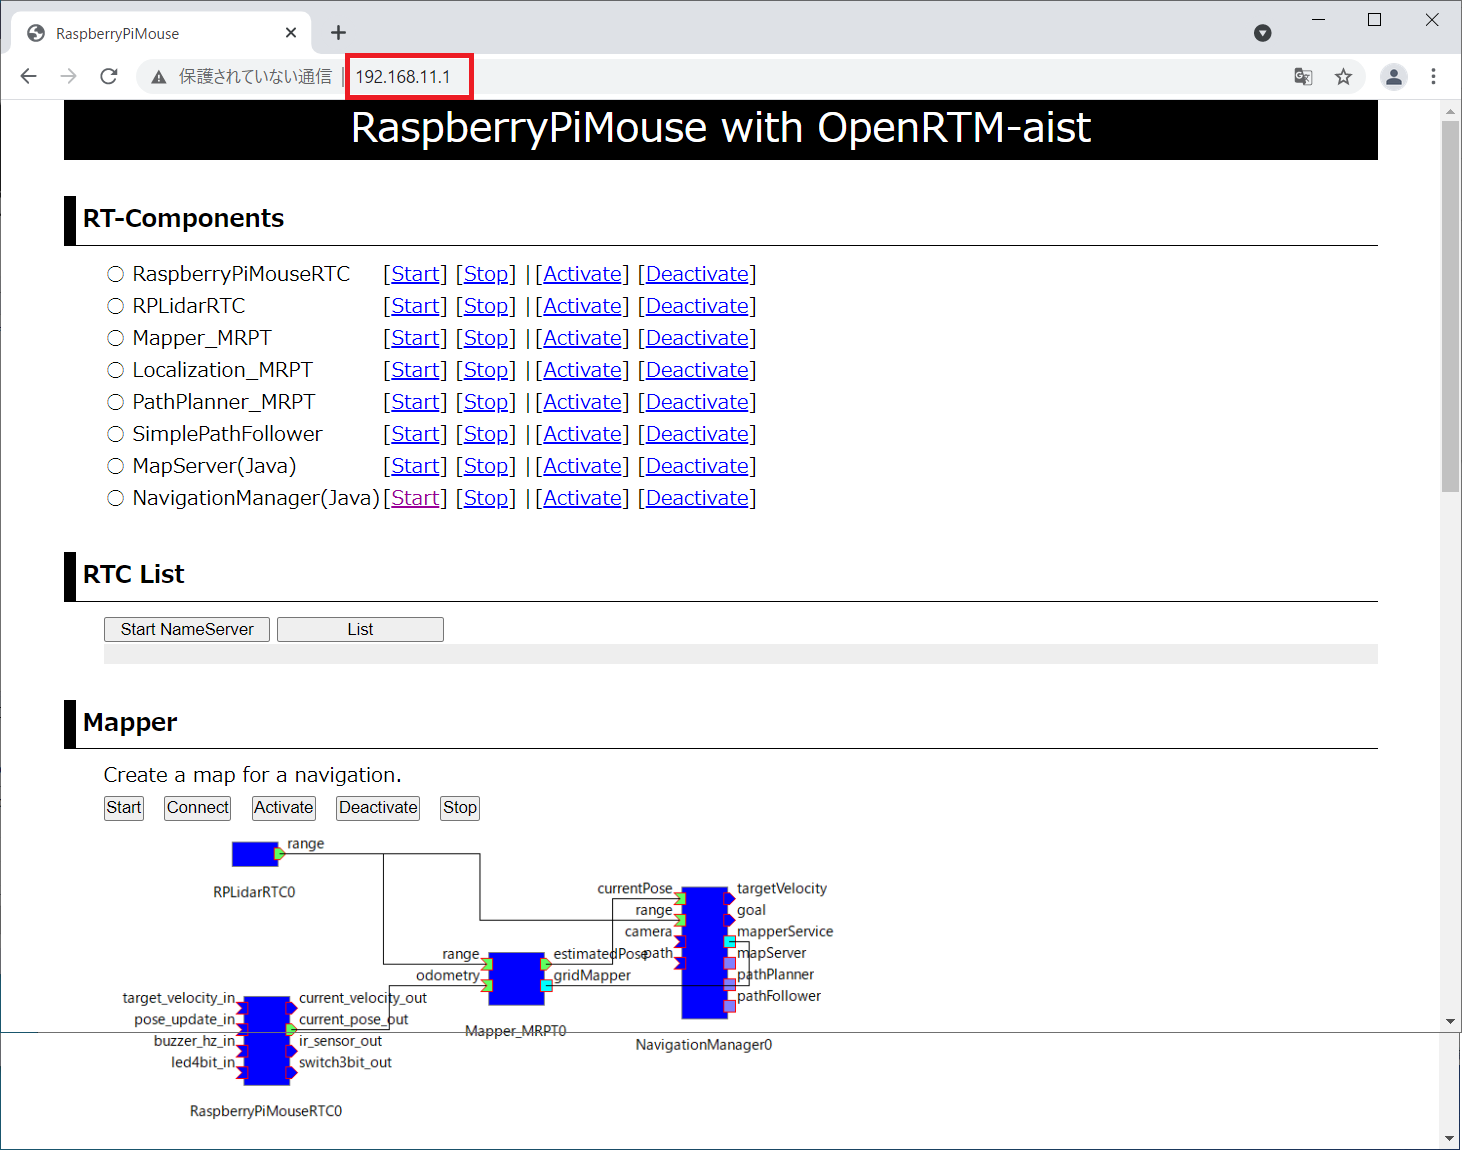
The RaspberryPiMouse with OpenRTM-aist screen will then be displayed.
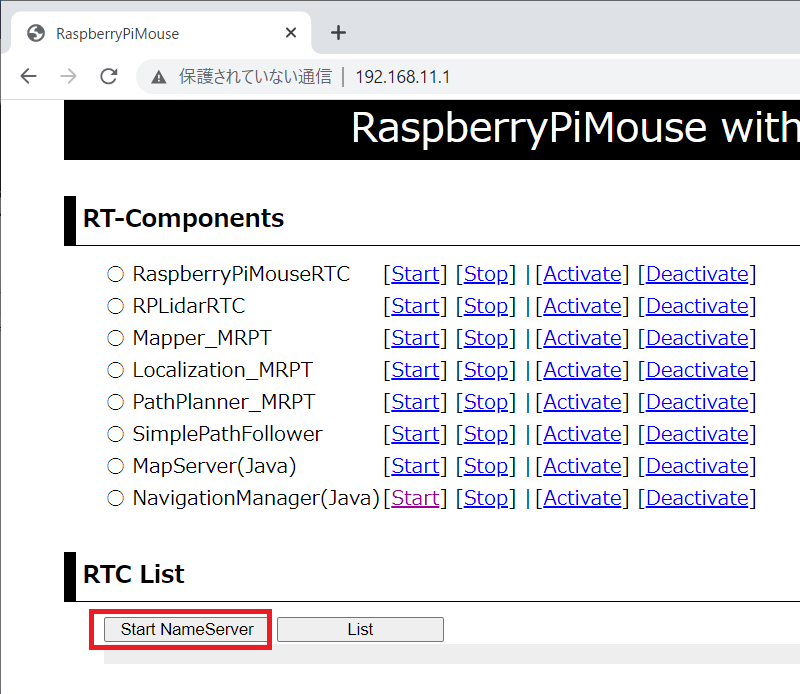
First, click the Start NameServer button to start the Name Server.
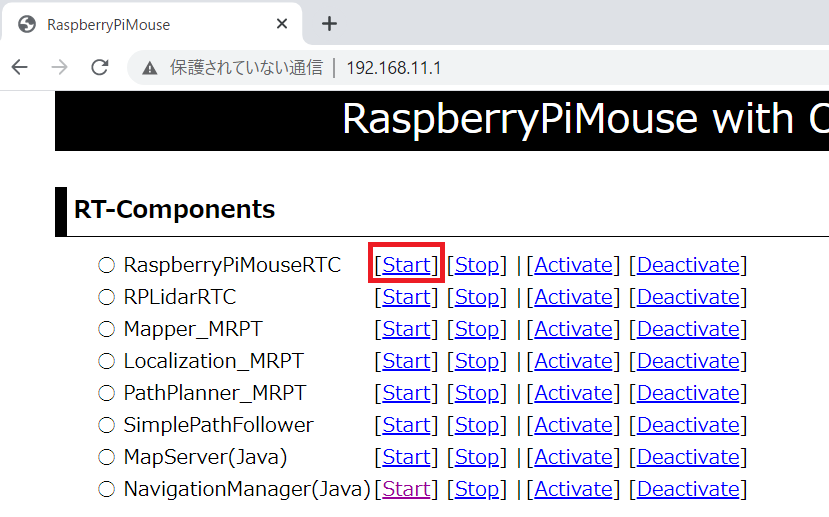
Click Start for RaspberryPiMouseRTC.
If the original screen does not return, click Back to the top page.
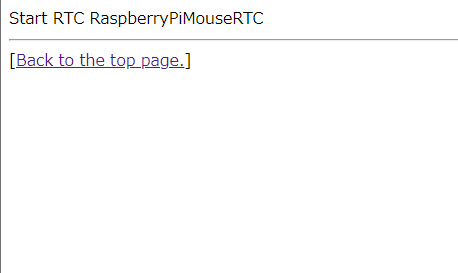
This completes the procedure.
Adding the Name Server
Next, use the [Add Name Server] button in RT System Editor to add 192.168.11.1.
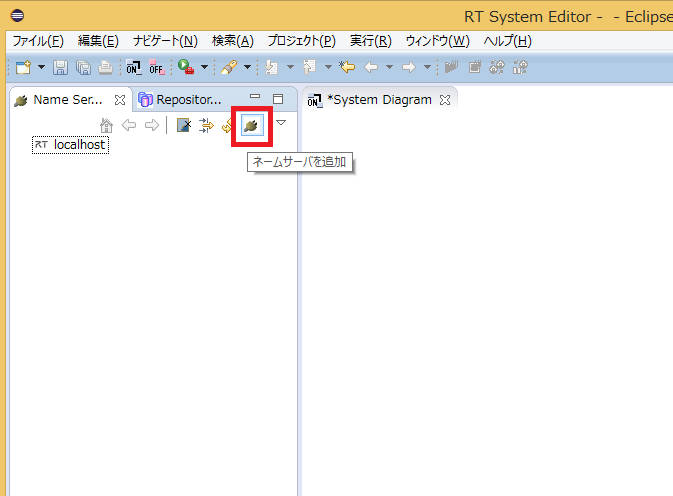
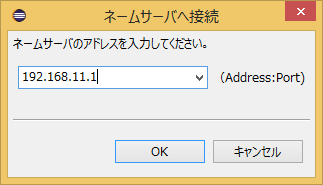
The following two RTCs will then become visible.
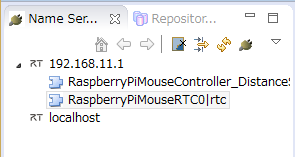
RaspberryPiMouseRTC is an RT component for controlling the Raspberry Pi Mouse, developed by the Robot System Design Laboratory at Meijo University.
Connecting the Ports
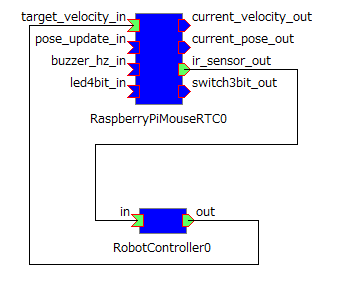
In RT System Editor, connect the RaspberryPiMouseRTC and RobotController components as shown below.
Turning On the Motor Power
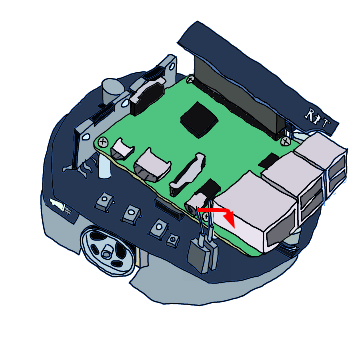
Before operation, turn on the motor power switch.
Be sure to turn off the motor power frequently when it is not needed.
Activation
When you activate the RTCs, you will be able to control the Raspberry Pi Mouse.
Summary
In this tutorial, you learned:
- How to create a RobotController component for controlling a Raspberry Pi Mouse in a simulator.
- How to define RTC specifications, including InPorts, OutPorts, and configuration parameters.
- How to generate Python template code using RTCBuilder.
- How to edit the generated RobotController.py source code.
- How to implement activity processing for activation, execution, and deactivation.
- How to connect RobotController to RaspberryPiMouseSimulator and verify operation in RTSystemEditor.
- How to operate the simulator using configuration sliders.
- How to connect to an actual Raspberry Pi Mouse access point and verify operation on real hardware.
- How to start the Name Server and RTC on the Raspberry Pi Mouse when required.
- How to connect RaspberryPiMouseRTC and RobotController and activate the RTCs.
By completing this tutorial, you have learned how to build, edit, connect, and operate a Python-based RobotController RTC for controlling a Raspberry Pi Mouse in both simulation and actual hardware environments.